
If you’re craving a comforting, velvety side dish, this Creamy Corn Recipe is exactly what you need. It’s super simple to make but packs so much cozy flavor—something about tender corn cooked with buttery onions and garlic in a creamy sauce just hits the spot every time.

Why You'll Love This Recipe
I honestly make this creamy corn side dish whenever I want something quick but still impressive with dinner. It’s that perfect blend of savory and sweet, and the texture is just dreamy.
- Quick & Easy: Ready in just 20 minutes, perfect for busy weeknights or last-minute guests.
- Versatile Comfort: Easily made dairy-free if you’re avoiding dairy but still want creamy goodness.
- Flavorful Simplicity: The combo of sautéed onions, garlic, and a touch of parmesan adds depth without fuss.
- Great Make-Ahead: Stores well for up to 4 days, so you have a delicious side ready to go anytime.
Ingredients & Why They Work
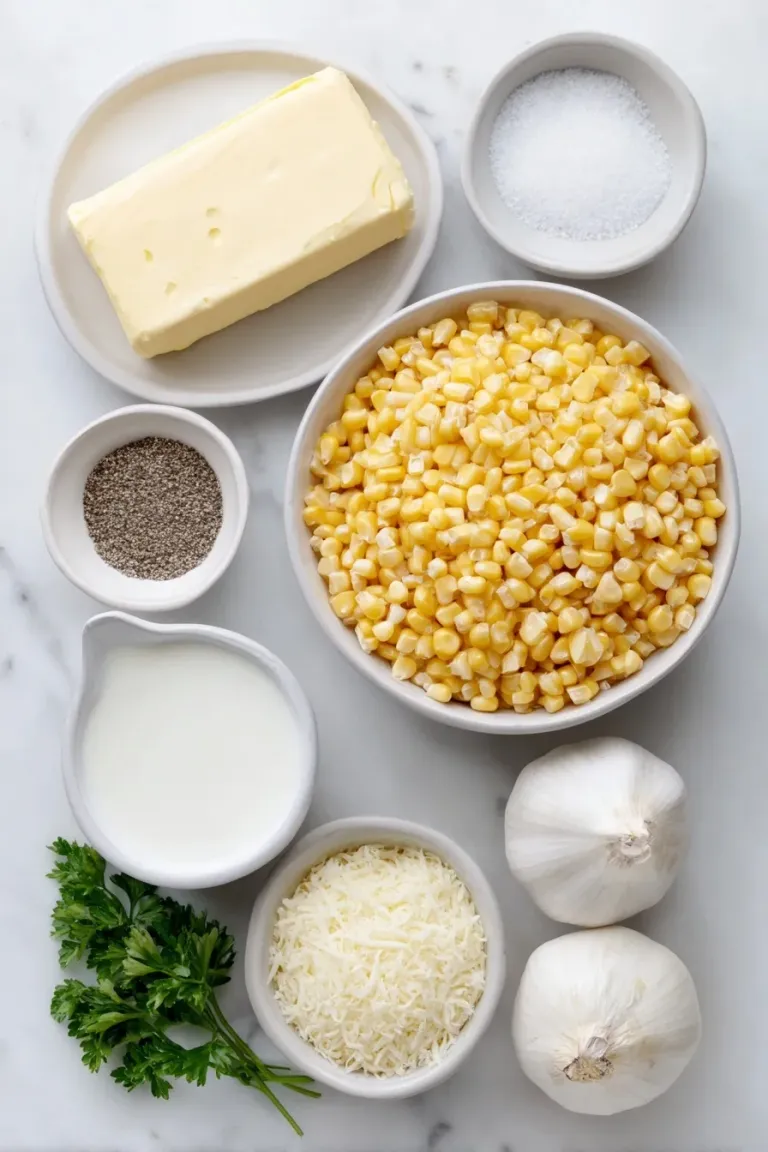
Before we jump into the cooking, let’s chat about what you need and why these ingredients make this creamy corn recipe so special. I usually keep frozen corn on hand for convenience—it’s sweet and fresh-tasting once thawed. Using a little flour or arrowroot powder helps thicken the sauce to that perfect consistency, and fresh parmesan is a game-changer if you want a cheesy finish.
 Save
- Unsalted butter: Adds richness and helps sauté the aromatics without overpowering the delicate corn flavor.
- Yellow onion: Brings a mild sweetness and depth, creating a flavorful base for the creamed corn.
- Garlic cloves: Provides a subtle aromatic kick that complements the sweetness of the corn.
- Frozen corn kernels: Convenient, sweet, and tender, perfect for this creamy corn recipe year-round.
- Salt: Essential for enhancing all the flavors, start with a little and adjust to taste.
- Freshly ground black pepper: Adds just enough spice and warmth to balance the sweetness.
- Whole milk or dairy-free milk: Creates that rich, creamy texture; choose dairy-free options if needed.
- Arrowroot powder, cornstarch, or all-purpose flour: Thickens the sauce smoothly without lumps, giving you that perfect creaminess.
- Freshly grated parmesan (optional): Adds savory depth and a nutty flavor if you want a cheesy touch.
- Fresh parsley: A bright herbaceous pop of color and fresh flavor to finish the dish.
Make It Your Way
This Creamy Corn Recipe is wonderfully versatile, so don’t hesitate to make it your own. Whether you’re tailoring it for dietary needs or adding a seasonal twist, there’s plenty of room to get creative and enjoy a comforting side dish that suits your style.
- Dairy-Free Delight: Swap the whole milk for almond, oat, or coconut milk and use vegan butter instead of unsalted butter. I did this once for a friend who’s lactose intolerant, and the dish turned out just as creamy and delicious!
- Cheesy Upgrade: Stir in the optional parmesan at the end for a lovely cheesy depth. I love this version when serving alongside a simple grilled chicken or steak dinner.
- Herbal Freshness: Fresh parsley on top adds a pop of color and a subtle herbal note, but feel free to experiment with chives or thyme for a new flavor twist.
- Extra Thick and Cozy: If you prefer your creamed corn even thicker, just add an extra tablespoon of arrowroot powder or cornstarch to the milk mixture. This trick really amps up the creamy, spoonable texture!
Step-by-Step: How I Make Creamy Corn Recipe
 Save
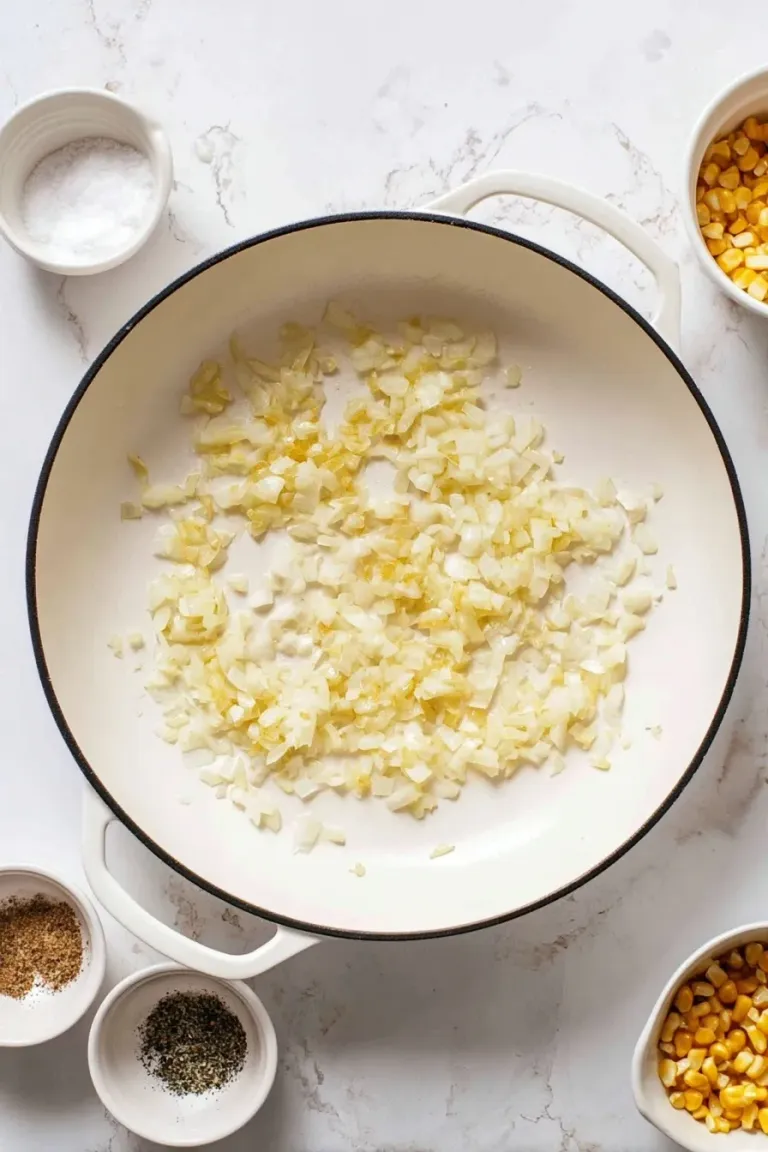
Step 1: Sauté the Aromatics to Build Flavor
Start by melting 1 tablespoon of unsalted butter in a medium skillet over medium heat. Add the chopped yellow onion and minced garlic, then sauté for about 5 to 6 minutes until the onions become translucent and you can smell that inviting aroma. This step is key—it creates a flavorful base that makes the corn taste extra comforting.
Step 2: Add Corn and Season Well
Next, add your thawed frozen corn kernels (a 16 oz bag), along with ½ teaspoon salt and ¼ teaspoon freshly ground black pepper. Cook for about 5 minutes until the corn is softened and heated through. This allows the natural sweetness of the corn to shine while absorbing the savory onion and garlic flavors.
Step 3: Whisk the Milk and Thickener
While the corn is cooking, whip up the creamy base by whisking together 1 ½ cups of whole milk (or your preferred dairy-free milk) with 1 tablespoon of arrowroot powder, cornstarch, or all-purpose flour. Make sure the mixture is smooth with no lumps—this is what will thicken your sauce beautifully.
Step 4: Combine and Simmer to Thicken
Pour the milk-thickener mixture into the skillet with the corn. Bring everything to a gentle boil, then lower the heat to a simmer. Stir frequently as the sauce cooks for about 3 to 5 minutes, until it thickens into that perfect creamy consistency that hugs every kernel.
Step 5: Blend for Extra Creaminess (Optional)
If you want a luscious, ultra-creamy texture, here’s a little trick: use an immersion blender to puree some of the corn mixture right in the skillet. Alternatively, transfer about 1 cup of the corn mixture to a blender or food processor, blend until silky smooth, then stir it back in. This step is optional but really elevates the dish.
Step 6: Taste, Finish, and Serve Warm
Finally, taste your creamy corn and adjust the seasoning with a pinch more salt or pepper if needed. If you’re using parmesan, stir in ¼ cup of freshly grated cheese now to add a lovely cheesy richness. Garnish with fresh parsley for a vibrant finish, then serve this comforting side warm alongside your favorite mains.
Top Tip
These tips will help you get the most delicious and creamy results from your Creamy Corn Recipe every time. Once you get the hang of these little tricks, it’s so easy to make this comforting side dish a regular at your table!
- Choosing the Corn: I always use frozen corn kernels thawed before cooking. It saves time and provides consistent sweetness and texture all year round.
- Cooking Aromatics Low and Slow: Sautéing the onion and garlic gently until translucent really builds depth of flavor — rushing this step means missing out on that lovely aromatic base.
- Thickening Trick: Mixing the arrowroot powder or cornstarch with milk first before adding it to the skillet helps prevent lumps, resulting in a silky smooth sauce every time.
- Optional Puree: Instead of pureeing the whole batch, blending just about one cup of the corn creates the perfect balance of creamy texture and kernels without overprocessing.
How to Serve Creamy Corn Recipe
 Save
Garnishes
Sprinkle freshly chopped parsley over your creamy corn for a pop of herbal brightness and color. For an extra touch, a dusting of freshly grated parmesan right before serving adds richness and a subtle savory kick. If you like a little heat, a pinch of smoked paprika or a few cracks of black pepper also work beautifully.
Side Dishes
This Creamy Corn Recipe makes a fantastic side dish for so many meals. It pairs perfectly with grilled chicken or steak, complements barbecue plates, or rounds out a vegetarian spread with dishes like stuffed peppers or roasted vegetables. You could also serve it alongside mashed potatoes or a simple green salad for a comforting, well-balanced dinner.
Make Ahead and Storage
Storing Leftovers
Once cooled, transfer leftover creamed corn to an airtight container and store in the refrigerator. It will keep fresh and delicious for up to 3-4 days — perfect for enjoying the next day or two without any waste.
Freezing
Although the texture may be slightly affected, you can freeze leftover creamed corn for up to 1 month. Make sure it’s sealed tightly in a freezer-safe container. Thaw overnight in the fridge before reheating gently.
Reheating
Reheat your creamed corn slowly over low heat on the stovetop or in the microwave. If it thickens too much during storage, stir in a splash of milk to bring back that luscious creamy consistency before serving.
Final Thoughts
Making this Creamy Corn Recipe has quickly become one of my go-to comforting side dishes—it’s so simple yet wildly satisfying. It’s perfect for both weeknight dinners and special occasions, and with just a few pantry staples, you can whip up a rich, luscious dish that feels like a warm hug on a plate. I hope you enjoy creating and sharing this creamy delight as much as I do!