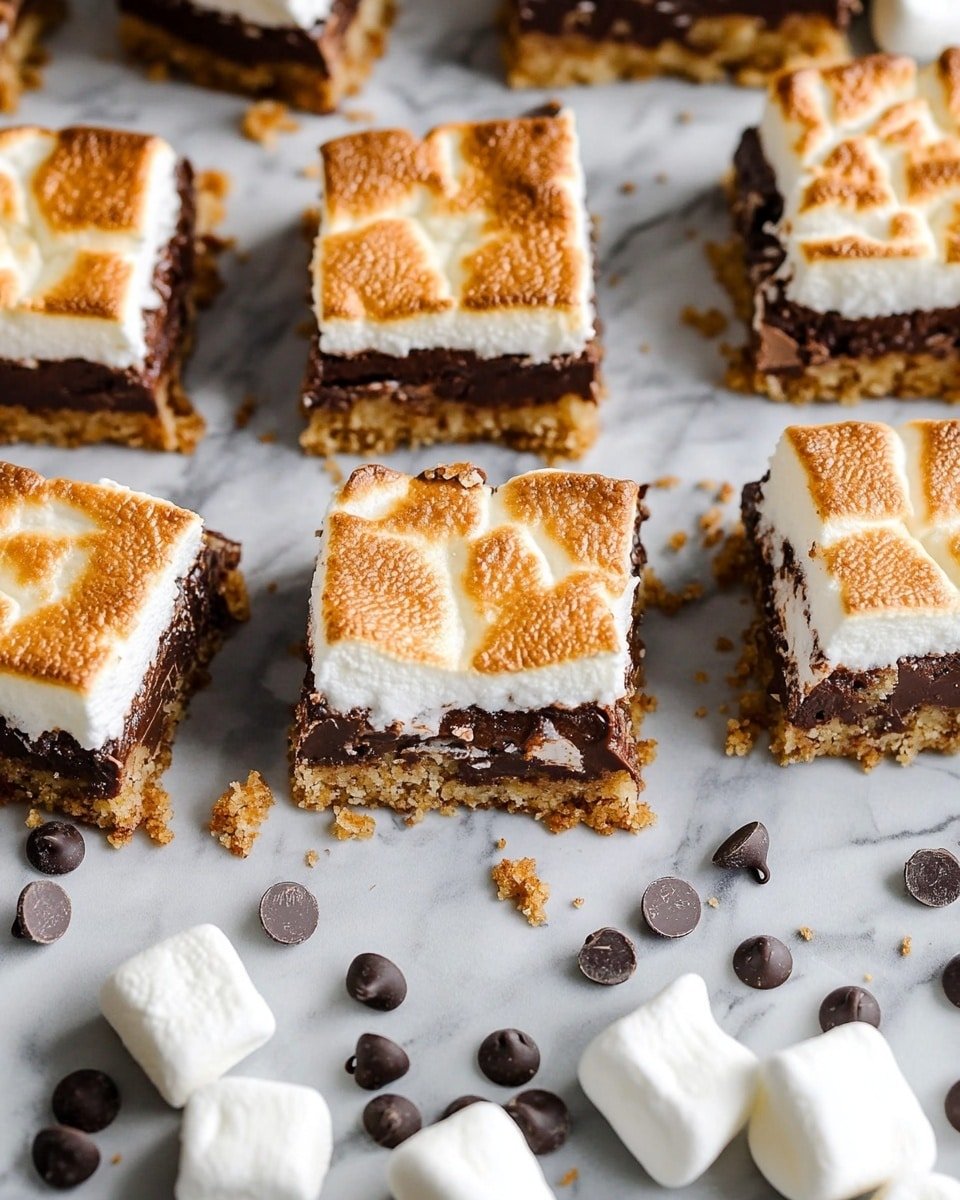
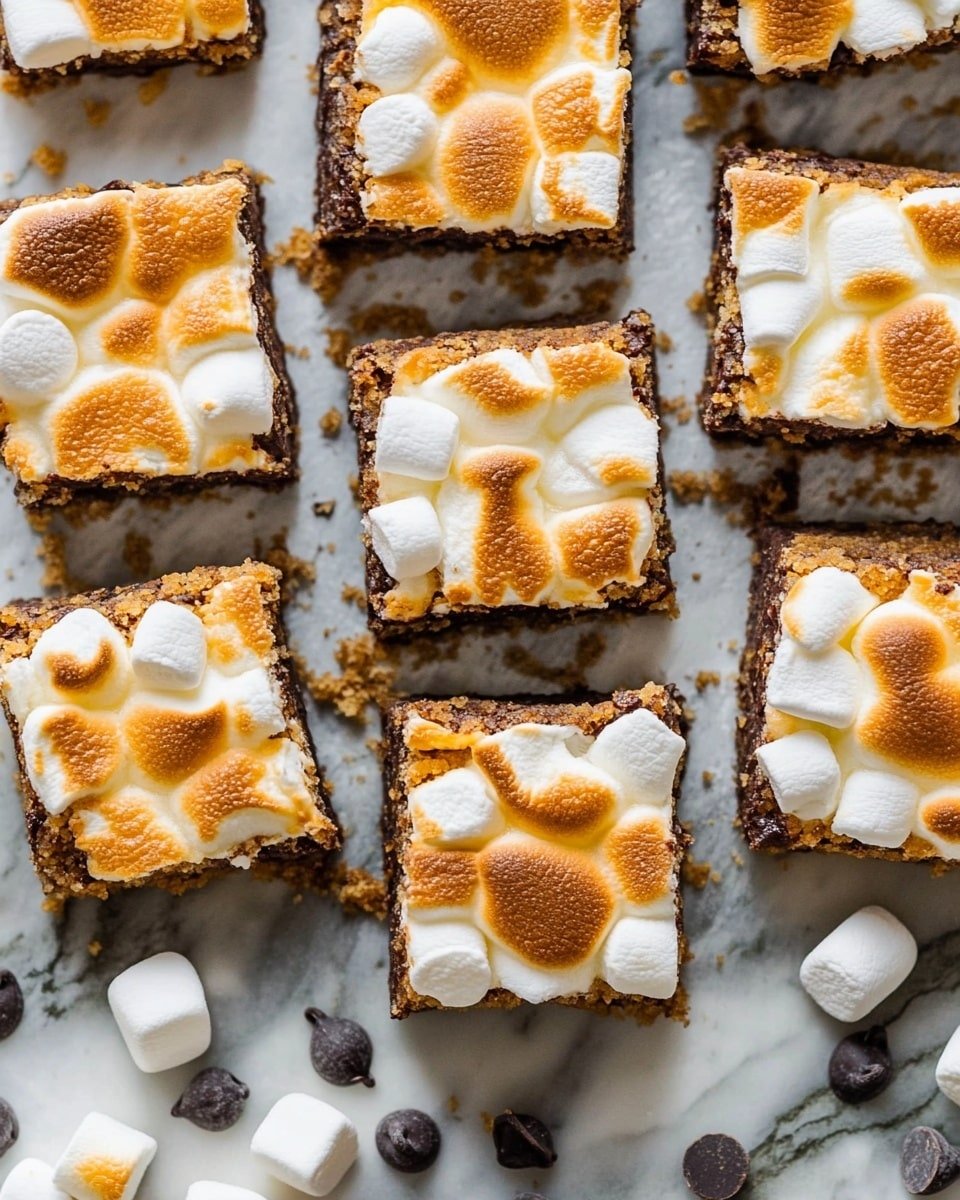
If you’re a fan of all things sweet and nostalgic, then this S’more Bars Recipe is about to become your new obsession. Imagine those gooey marshmallows and melty chocolate you crave, but in a handy bar form—perfect for sharing or sneaking one whenever the mood strikes!
Why You’ll Love This Recipe
- Nostalgia in Every Bite: Relish the classic campfire s’mores taste anytime at home.
- Simple Ingredients: Uses pantry staples that you probably already have.
- Crowd-Pleaser: Perfect for parties, potlucks, or cozy family dessert time.
- Quick and Fuss-Free: From prep to fridge to table in under an hour.
Ingredients You’ll Need
This S’more Bars Recipe keeps it delightfully simple with just a handful of ingredients, each bringing its own magic — the buttery crust, melty chocolate, and fluffy marshmallows all work in harmony to give you that perfect s’mores experience.
- Graham cracker crumbs: The base of our crust, offering that signature crunch and sweetness.
- Melted butter: Binds the crust together and adds rich, buttery flavor.
- Chocolate chips: Use semi-sweet or milk chocolate for that gooey, melty goodness.
- Mini marshmallows: Toast to golden perfection on top for that iconic s’mores finish.
Variations
One of the best parts of this S’more Bars Recipe is how easy it is to make your own. Swap out ingredients or add in extras to make it uniquely yours. Whether you’re dietary-conscious or just craving a twist, there’s plenty of room to play.
- Nutty Addition: Add chopped toasted pecans or almonds into the crust for an extra crunch.
- Chocolate Swap: Use white or dark chocolate chips instead of regular chocolate for a different flavor profile.
- Marshmallow Alternative: Use jumbo marshmallows cut into smaller pieces for gooier pockets of sweetness.
- Gluten-Free: Use gluten-free graham cracker crumbs to keep this dessert friendly for gluten-sensitive friends.
How to Make S’more Bars Recipe
Step 1: Preheat and Prep the Pan
Begin by preheating your oven to 350°F. Grease a 9×13-inch baking pan with cooking spray to prevent sticking — this ensures your bars come out in perfect squares and your cleanup is easier!
Step 2: Make the Graham Cracker Crust
In a mixing bowl, combine the graham cracker crumbs with melted butter until the mixture is evenly moistened. Press this mixture firmly into the bottom and slightly up the sides of your prepared pan to form a uniform crust.
Step 3: Bake the Crust
Bake your crust in the preheated oven for about 8 minutes. This step helps it set up nicely and gives it a slight toasty flavor that’s the perfect base for all those sweet toppings.
Step 4: Add Chocolate and Marshmallows
Take the crust out of the oven and immediately sprinkle a generous layer of chocolate chips over it. Follow that with a layer of mini marshmallows, covering the entire surface. This is where the magic of gooey, melty s’mores really begins!
Step 5: Final Bake and Cool
Return the pan to the oven and bake for 20 minutes or until the marshmallows turn beautifully golden brown. Once baked, remove the pan from the oven and let it cool to room temperature before placing it in the fridge to set. This helps the bars hold their shape when slicing.
Pro Tips for Making S’more Bars Recipe
- Press Crust Firmly: Pressing the crust firmly ensures it bakes evenly and holds together after cooling.
- Use Mini Marshmallows: They melt more evenly and create that classic gooey top rather than one big marshmallow blob.
- Watch Marshmallow Browning: Keep an eye on the last few minutes of baking to get that perfect golden brown without burning.
- Chill Before Cutting: Cooling and refrigerating help the bars set nicely, giving you neat slices that don’t fall apart.
How to Serve S’more Bars Recipe
Garnishes
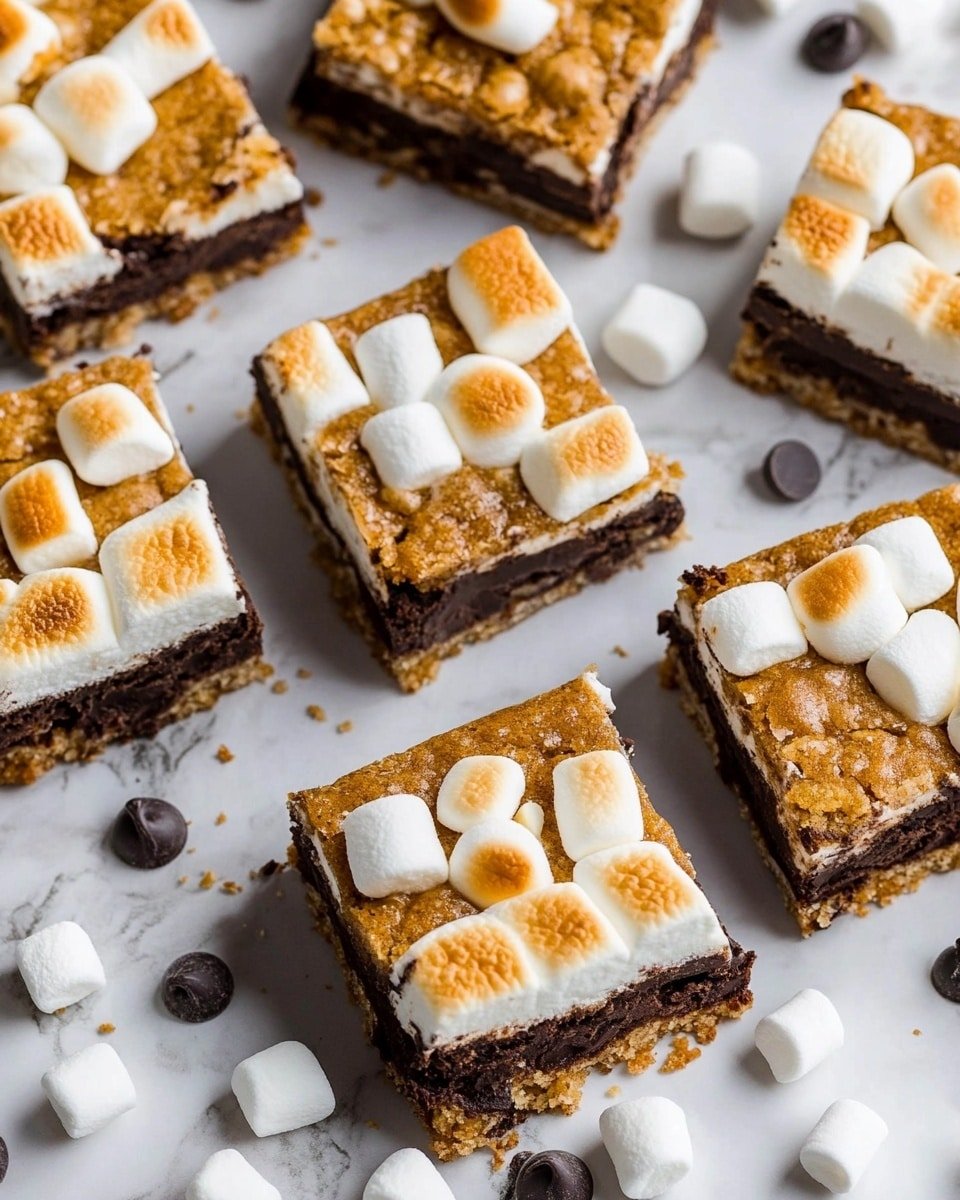
Sprinkle a little extra crushed graham cracker or mini marshmallows on top before serving for a charming finishing touch. If you want to get fancy, drizzle some melted chocolate or caramel over the bars for a little flair.
Side Dishes
Pair these bars with a scoop of vanilla ice cream or a dollop of whipped cream to elevate the treat even more. Fresh berries on the side can add a bright contrast to the richness.
Creative Ways to Present
Serve the S’more Bars Recipe on a wooden platter to evoke that rustic campfire vibe, or stack them in a clear glass jar for an easy grab-and-go dessert. For parties, presenting them with little skewers plated alongside warm hot chocolate creates a fun, interactive experience.
Make Ahead and Storage
Storing Leftovers
Once cooled and cut, store your s’more bars in an airtight container in the fridge. They’ll stay fresh and delicious for up to 4 days, perfect for snacking anytime.
Freezing
You can freeze these bars by wrapping them individually in plastic wrap and placing them in a freezer-safe bag or container. They freeze well for up to 2 months, so you can enjoy that s’mores magic whenever you like.
Reheating
To enjoy the gooey texture again, warm the bars gently in the microwave for 15-20 seconds or pop them in a low oven for a few minutes. This brings the marshmallows back to that perfectly melty state.
FAQs
-
Can I use regular marshmallows instead of mini marshmallows for this S’more Bars Recipe?
Yes, you can substitute regular marshmallows, but cutting them into smaller pieces will help them melt evenly and avoid a thick, clumpy topping. Mini marshmallows are ideal for that oozing, toasty effect!
-
Is it necessary to refrigerate the bars before slicing?
Chilling the bars helps them firm up so they cut cleanly without crumbling or melting apart. While you can slice them warm, refrigeration gives the best texture for neat serving.
-
Can I make these bars ahead of time for a party?
Absolutely! You can prepare and bake the bars a day ahead, refrigerate them overnight, and even freeze them if needed. Just warm briefly before serving for that fresh-out-of-the-oven feel.
-
What type of chocolate works best in this S’more Bars Recipe?
Semi-sweet or milk chocolate chips are classic choices that melt beautifully. You can experiment with dark or even white chocolate chips depending on your flavor preferences.
Final Thoughts
There’s something so comforting and joyful about this S’more Bars Recipe—like a little sweet hug from childhood. Whether you’re looking to impress guests or treat yourself after a long day, these bars deliver that perfect combination of crunchy, gooey, and chocolaty. Go ahead, give them a try and watch your loved ones fall instantly in love!
PrintS’more Bars Recipe
Delightfully sweet and gooey, these S’more Bars combine crunchy graham cracker crust with melted chocolate chips and toasted mini marshmallows, perfect for an easy dessert or snack. They are quick to prepare and bake, invoking the classic campfire treat in a convenient bar form.
- Prep Time: 30 minutes
- Cook Time: 28 minutes
- Total Time: 58 minutes
- Yield: 6 servings
- Category: Dessert
- Method: Baking
- Cuisine: American
Ingredients
Crust
- 2 cups Graham cracker crumbs
- 1/2 cup Melted butter
Topping
- 4 cups Chocolate chips
- 1 package Mini marshmallows
Instructions
- Preheat oven: Preheat your oven to 350°F to prepare for baking the crust and topping.
- Prepare baking pan: Grease a 9×13 inch baking pan thoroughly with cooking spray to prevent sticking.
- Make crust: Mix the graham cracker crumbs with melted butter until combined. Press this mixture firmly and evenly into the bottom and up the sides of the prepared baking pan.
- Bake crust: Bake the crust in the oven for 8 minutes to set it slightly before adding the topping.
- Add toppings: Remove the crust from the oven and immediately sprinkle chocolate chips evenly over the warm crust, followed by an even layer of mini marshmallows on top.
- Bake again: Return the pan to the oven and bake for an additional 20 minutes, or until the marshmallows are toasted and golden brown.
- Cool and chill: Let the baked bars cool completely at room temperature, then place them in the refrigerator to chill and set further before cutting.
- Serve: Cut into bars and serve chilled for best texture and flavor.
Notes
- For extra gooey bars, use a mix of milk and semi-sweet chocolate chips.
- Press the crust firmly to ensure it binds well and holds the toppings.
- Watch the marshmallows closely during the final bake to avoid burning; they should be golden brown.
- Storing the bars in the fridge helps them hold together when cutting and serving.
- These bars are best consumed within 2-3 days for freshness.

