If you’re craving a dreamy dessert that’s both fuss-free and absolutely delicious, this No-Bake Mini Banana Cream Pies Recipe might just become your new favorite. These charming little pies bring together the perfect marriage of creamy banana goodness, buttery graham cracker crusts, and fluffy whipped topping — all without turning on the oven. Ready to wow everyone with ease and flavor? Let’s dive right in!
Why You’ll Love This Recipe
- Effortless Elegance: These mini pies look bakery-worthy but come together without baking or complicated techniques.
- Bursting with Freshness: Ripe bananas and homemade custard create a luscious combination you’ll want to savor bite after bite.
- Perfect Portions: Individual minis make serving easy and add a playful charm to any gathering or family dessert time.
- Customizable Whipped Topping: Silky homemade cream balances richness and lightness, perfect for your personal flair.
Ingredients You’ll Need
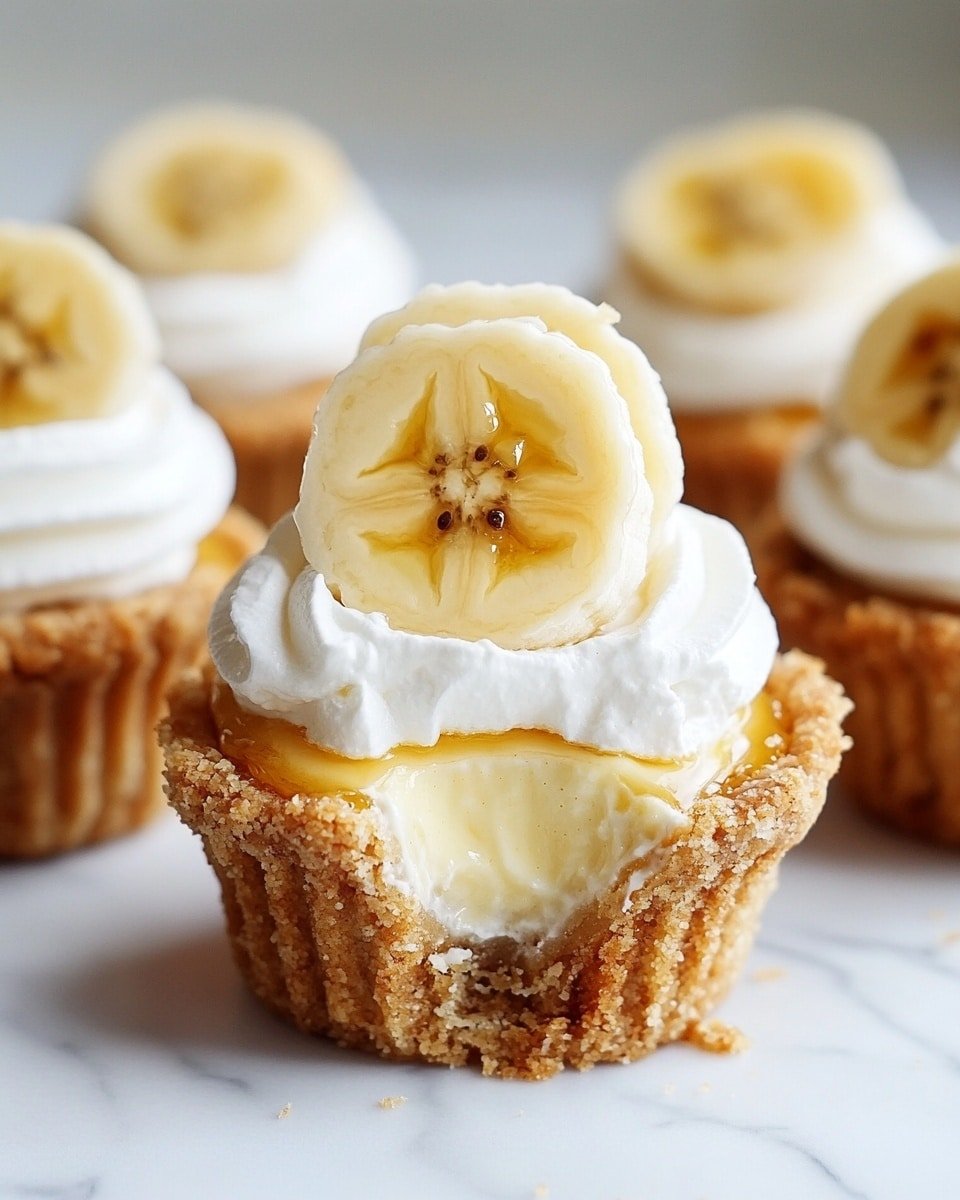
Gathering these simple yet essential ingredients is the first step to creating your own No-Bake Mini Banana Cream Pies Recipe. Each ingredient plays a crucial role, whether it’s building the crisp crust, crafting the velvety cream filling, or whipping up that cloud-like finish on top.
- Graham cracker crumbs: These provide a sweet, buttery crunch and the perfect sturdy base for your mini pies.
- Unsalted butter: Melted into the crumbs, it binds the crust and adds richness; coconut oil works great if you’re dairy-free.
- Sugar and kosher salt: Just enough sugar sweetens every layer, while a pinch of salt enhances all the flavors.
- Milk or heavy cream: The star liquid for your filling — whole milk for smoothness or heavy cream for extra indulgence.
- Cornstarch and egg yolks: Together, they thicken the filling to that perfect custard consistency without lumps.
- Ripe bananas: Choose ones with golden skin and small brown spots for the sweetest flavor and creamy texture.
- Heavy whipping cream, powdered sugar, and vanilla: These ingredients transform into the airy whipped topping that finishes off your mini pies beautifully.
Variations
One of the best things about the No-Bake Mini Banana Cream Pies Recipe is how adaptable it is. Feel free to make adjustments to suit your pantry, dietary needs, or flavor imagination — these mini pies love creativity!
- Dairy-Free Delight: Swap butter for coconut oil and use coconut or almond milk with a thickener to keep everything silky and perfect.
- Tropical Twist: Add a layer of shredded toasted coconut or top with chopped pineapple for a sunny flavor boost.
- Chocolate Lover’s Version: Mix cocoa powder into your crust or drizzle melted dark chocolate over the whipped topping for a rich finish.
How to Make No-Bake Mini Banana Cream Pies Recipe
Step 1: Create Your Perfect Crust Foundation
Start by mixing the graham cracker crumbs, melted butter, sugar, and salt in a medium bowl until the texture resembles damp sand that sticks together when pressed. You want it just moist enough so that the crust will hold but still remain crisp—not soggy. This step is key to the pie’s irresistible texture.
Step 2: Form Individual Crust Shells
Press the crumb mixture firmly into 6 to 8 small tart pans or ramekins, using the flat bottom of a measuring cup to pack it in evenly. Take your time shaping the edges neatly so your minis look polished and professional. Pop them in the fridge to chill as you prepare the luscious fillings.
Step 3: Master the Silky Cream Base
Heat 1¾ cups of milk in a saucepan until steaming (not boiling) while whisking sugar, cornstarch, and salt in a separate bowl until smooth. In another bowl, whisk egg yolks with the remaining sugar then slowly add ¼ cup cold milk to temper and avoid scrambling your eggs. This prep ensures your custard turns dreamy and lump-free.
Step 4: Combine and Cook to Perfection
Pour the tempered egg yolk mixture into the hot milk, whisking nonstop, then cook over medium heat for 2 to 3 minutes until the filling thickens to a pudding-like consistency. Look for the classic “coat the back of a spoon” texture—this luscious cream will be the heart of your pies.
Step 5: Add Finishing Touches and Chill
Remove the pot from heat and immediately whisk in butter and vanilla until velvety smooth and glossy. Press plastic wrap directly onto the surface to prevent a skin from forming and let it cool to room temperature before chilling it for at least 2 hours. Patience here pays off with that perfect creamy texture.
Step 6: Prepare Fresh Banana Layers
Slice your ripe bananas into quarter-inch rounds just before assembly to keep them looking fresh and golden. Lay down an even layer of these slices in each chilled crust, creating a natural, sweet base for the luxurious banana cream topping to rest on.
Step 7: Assemble Your Mini Masterpieces
Generously spoon or pipe the chilled banana cream filling over the banana layers in each crust. Smooth the tops with an offset spatula or the back of a spoon for a refined finish. Return the pies to the fridge for another 2 hours so everything can set beautifully.
Step 8: Create Picture-Perfect Whipped Topping
Beat cold heavy cream with powdered sugar and vanilla in a chilled bowl until soft peaks form — watch closely to avoid overbeating! This fluffy topping will add the perfect light contrast to the rich banana cream below.
Step 9: Add Final Garnishes
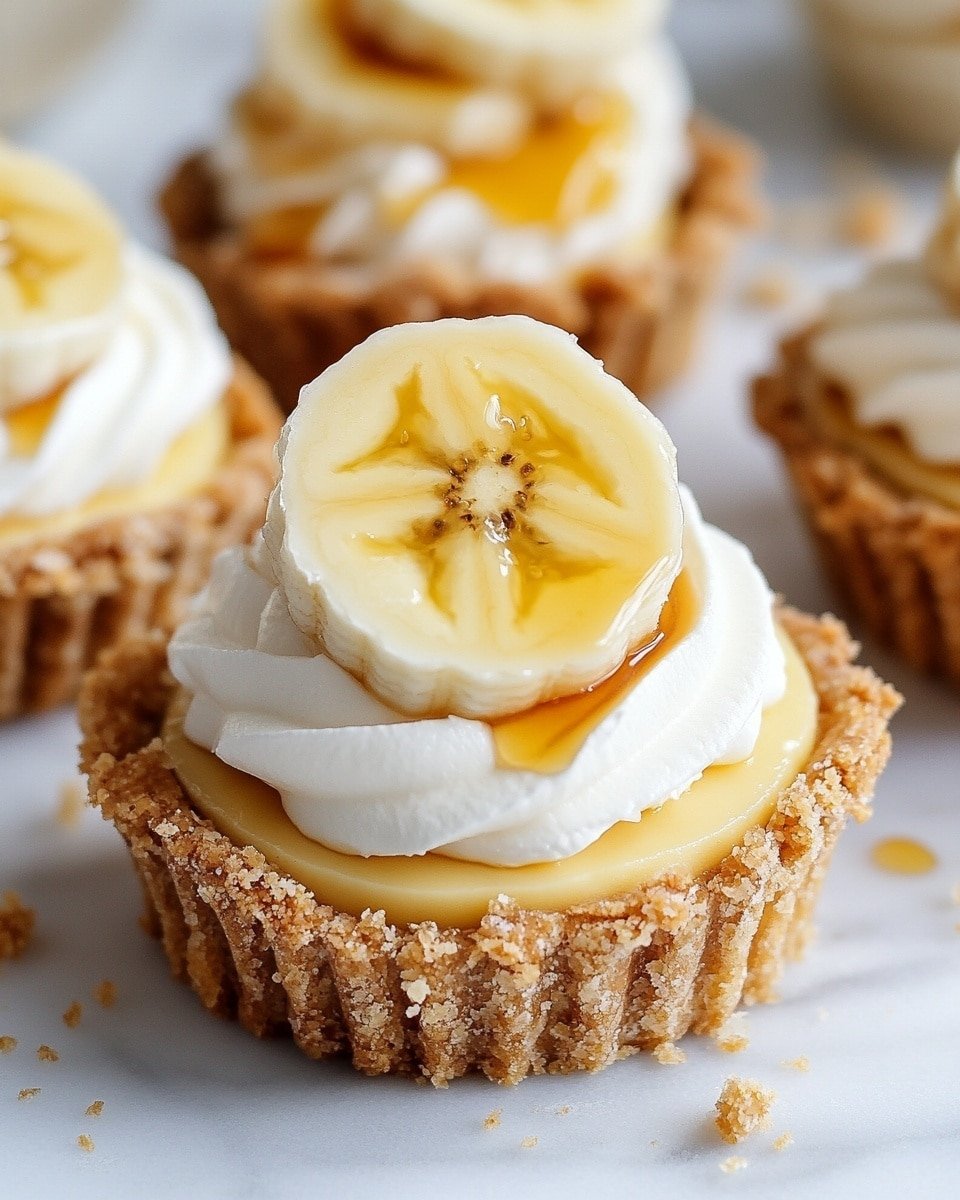
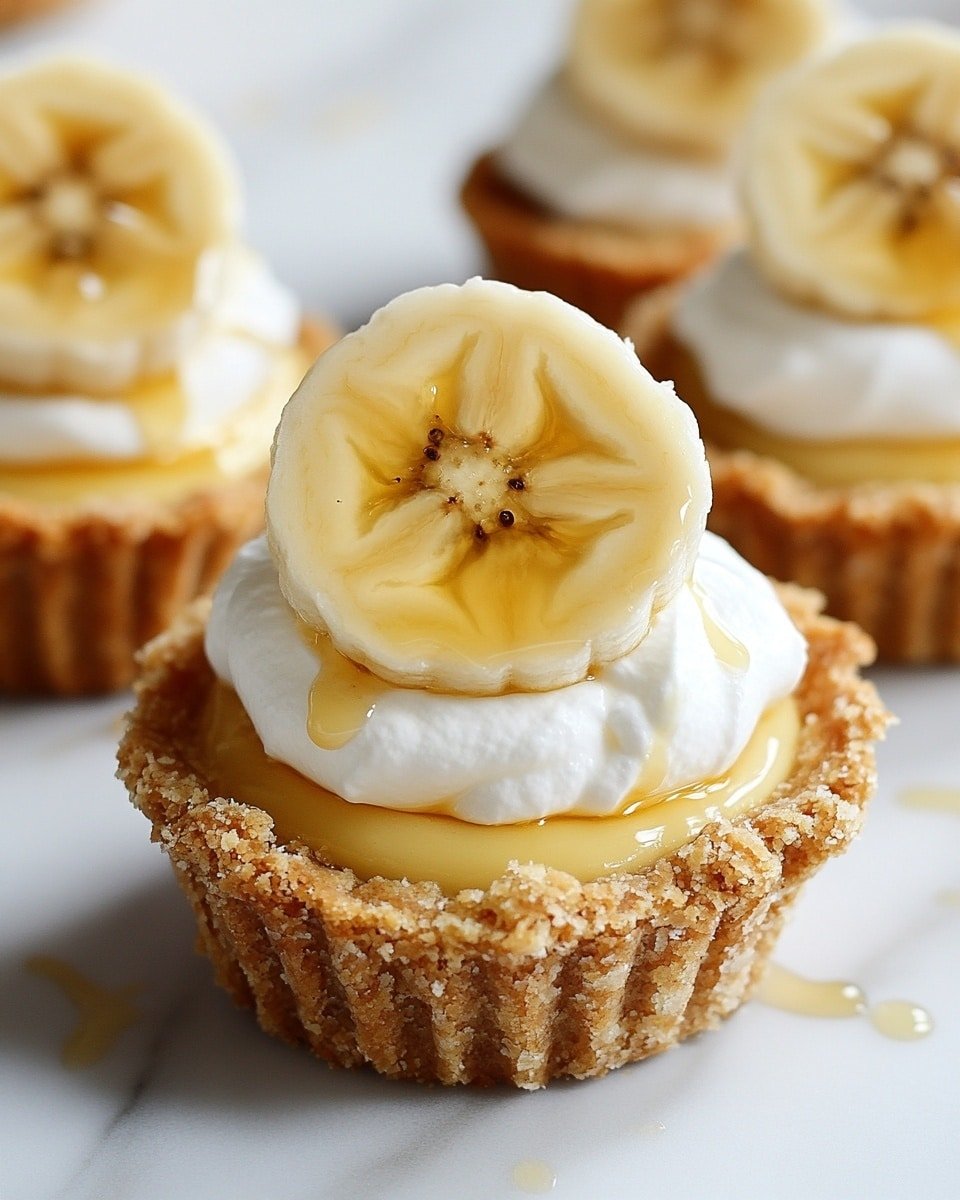
Top each mini pie with a generous cloud of whipped cream, arrange fresh banana slices in a pretty pattern, and sprinkle optional vanilla wafer crumbs or drizzle caramel or chocolate sauce for that wow factor. Voilà — your mini banana cream pies are ready to impress!
Pro Tips for Making No-Bake Mini Banana Cream Pies Recipe
- Chill Crust Thoroughly: Refrigerate your crusts for at least 30 minutes before filling to ensure they hold their shape beautifully when serving.
- Use Ripe Bananas: For that sweet, creamy texture, bananas should be perfectly ripe — yellow with a few brown specks works best.
- Plastic Wrap on Custard: Press plastic wrap directly on the surface of the custard to avoid a pesky skin from forming while it cools.
- Soft Peaks for Whipped Cream: Stop beating your cream as soon as it holds soft peaks to keep the topping silky and easy to dollop or pipe.
How to Serve No-Bake Mini Banana Cream Pies Recipe
Garnishes
Simple garnishes elevate these mini pies from delightful to downright stunning. Fresh banana slices arranged fanned atop whipped cream add an inviting look and fresh flavor. For an extra crunch, try sprinkling roughly chopped vanilla wafer cookies or drizzling caramel or chocolate sauce for a professional bakery feel right at your kitchen table.
Side Dishes
Pair these mini banana cream pies with something light and fresh to balance their creamy sweetness. A bright mixed berry salad or citrus sorbet can complement the rich flavors beautifully. For gatherings, a simple cup of coffee, tea, or sparkling water with a twist of lemon lets the pies shine as the star of the meal.
Creative Ways to Present
Want to impress? Serve these minis on a tiered cake stand for an eye-catching dessert table centerpiece. Experiment with cute mason jars or clear cups for a rustic vibe that lets layers show off beautifully. Adding edible flowers or a sprinkle of toasted nuts on top creates an instant wow moment that guests will love.
Make Ahead and Storage
Storing Leftovers
Leftover No-Bake Mini Banana Cream Pies keep best stored in an airtight container in the refrigerator. They stay fresh for up to 3 days, allowing the flavors to meld even more. Be mindful to protect the whipped topping so it keeps its fluffy texture rather than becoming dense.
Freezing
While these minis are best enjoyed fresh to preserve texture and flavor, you can freeze them without the whipped cream topping for up to one month. Wrap each pie tightly in plastic wrap and then place in a freezer-safe container. Thaw overnight in the fridge and add fresh whipped cream just before serving for the best experience.
Reheating
Since this is a cool dessert, reheating isn’t necessary or recommended. Instead, let refrigerated pies sit at room temperature for 10 to 15 minutes before serving to bring out their full flavor and soften the texture slightly, making every bite melt in your mouth.
FAQs
-
Can I make this recipe vegan or dairy-free?
Absolutely! Swap out the butter for coconut oil and use a plant-based milk like almond or oat milk combined with a thickener such as arrowroot powder instead of cornstarch. Use coconut cream whipped topping or a store-bought dairy-free alternative for the whipped cream to keep it both delicious and vegan.
-
How ripe should the bananas be for best results?
Choose bananas that are yellow with small brown spots—they are sweet, fragrant, and have the ideal creamy texture. Overripe bananas with large brown patches might be too mushy for slices but work great if you want to mash and mix them into the filling for extra banana flavor.
-
Can I make the pies ahead of time?
Yes! These pies actually benefit from chilling as it helps the flavors meld and the custard set perfectly. Prepare them a day in advance and store refrigerated until ready to serve, then add the whipped topping and garnish just before presenting.
-
What’s the best way to prevent bananas from browning in the pies?
Slice bananas right before assembling and immediately layering them into the crust. You can also lightly brush the slices with freshly squeezed lemon juice or pineapple juice to slow oxidation, helping them stay bright and fresh-looking.
Final Thoughts
There’s nothing quite like the joy of making and sharing these No-Bake Mini Banana Cream Pies Recipe with loved ones. The ease, freshness, and delight packed in every bite make this dessert a real crowd-pleaser. Give it a go and watch as everyone reaches for seconds — you’ve just found a keeper!
PrintNo-Bake Mini Banana Cream Pies Recipe
These No-Bake Mini Banana Cream Pies offer a classic dessert experience made easy with a crunchy graham cracker crust, silky banana cream filling, and cloud-like whipped topping. Perfect for any occasion, these individual pies are light, luscious, and visually appealing with fresh banana slices and optional garnishes like vanilla wafers and caramel drizzle.
- Prep Time: 30 minutes
- Cook Time: 15 minutes
- Total Time: 4 hours 30 minutes
- Yield: 6-8 mini pies
- Category: Dessert
- Method: Stovetop
- Cuisine: American
Ingredients
For the Graham Cracker Crust:
- 1 1/2 cups graham cracker crumbs (about 12 full crackers, finely crushed)
- 6 tablespoons unsalted butter, melted (coconut oil works as dairy-free alternative)
- 3 tablespoons granulated sugar
- 1/4 teaspoon kosher salt
For the Luscious Banana Cream Filling:
- 2 cups whole milk (heavy cream for ultra-rich texture)
- 2/3 cup granulated sugar, divided
- 1/3 cup cornstarch
- 1/4 teaspoon salt
- 4 large egg yolks (save whites for meringue or other uses)
- 3 tablespoons unsalted butter
- 2 teaspoons pure vanilla extract
- 3 medium ripe bananas (yellow with small brown spots)
For the Cloud-Like Whipped Topping:
- 1 1/2 cups heavy whipping cream, chilled
- 3 tablespoons powdered sugar
- 1 teaspoon vanilla extract
For the Finishing Touches:
- Additional banana slices for garnish
- Vanilla wafer cookies (optional, for extra texture)
- Caramel or chocolate drizzle (optional, elevates presentation)
Instructions
- Create Your Perfect Crust Foundation: Combine graham cracker crumbs, melted butter, sugar, and salt in a medium bowl, mixing until the texture resembles wet sand that holds together when pressed. Ensure the moisture level is balanced to avoid sogginess.
- Form Individual Crust Shells: Press the crumb mixture firmly into 6-8 tart pans or ramekins using the bottom of a measuring cup to create even, compact layers with neat edges and uniform thickness. Refrigerate the crusts while preparing the filling.
- Master the Silky Cream Base: Heat 1¾ cups of milk over medium heat in a heavy-bottomed saucepan until steaming but not boiling. In a separate bowl, whisk together ⅓ cup sugar, cornstarch, and salt until smooth to prevent lumps.
- Create the Perfect Custard Consistency: Whisk egg yolks with the remaining sugar until pale and thickened. Slowly add the remaining ¼ cup cold milk to the yolks, whisking continuously to temper and avoid curdling.
- Combine and Cook to Perfection: Gradually add the tempered yolk mixture into the hot milk, whisking constantly. Cook over medium heat for 2-3 minutes until thickened to pudding consistency, coating the back of a spoon and holding soft peaks.
- Add Finishing Touches to Your Cream: Remove from heat and whisk in butter and vanilla extract until smooth and glossy. Press plastic wrap directly onto the surface to prevent skin formation, cool to room temperature, then refrigerate for at least 2 hours.
- Prepare Fresh Banana Layers: Slice bananas into ¼-inch rounds just before assembling to prevent browning. Lay a single layer of banana slices into each chilled crust, creating an even base for the cream layer.
- Assemble Your Mini Masterpieces: Spoon or pipe the chilled banana cream over the banana layer in each shell, filling generously. Smooth the tops with an offset spatula and chill for at least 2 more hours until completely set.
- Create Picture-Perfect Whipped Topping: In a chilled bowl, beat heavy cream, powdered sugar, and vanilla extract until soft peaks form, being careful not to overbeat to maintain silky smooth texture.
- Add Final Garnishes: Top each mini pie with a dollop of whipped cream, arrange fresh banana slices artfully, and add optional garnishes like vanilla wafer crumbs or caramel/chocolate drizzle for an elegant presentation.
Notes
- Use ripe bananas with small brown spots for natural sweetness and flavor.
- Press plastic wrap directly on custard surface to prevent skin formation.
- Tempering the egg yolks prevents curdling and ensures smooth custard.
- For a dairy-free crust alternative, use coconut oil instead of butter.
- Whip cream to soft peaks for best texture – overwhipping can cause graininess.
- Refrigerating the pies for at least 4 hours improves flavor melding and texture setting.
- Optional garnishes such as vanilla wafers and drizzles add crunch and visual appeal.

