
If you’re looking for a quick, tasty snack that doesn’t heat up your kitchen or require any baking skills, you’re in the right place. This No-Bake Granola Bars Recipe is my go-to for an easy, chewy treat that you can customize however you like.

Jump to:
Why You'll Love This Recipe
I can’t get enough of these granola bars! They’re insanely easy to whip up, and I love that you can mix and match the add-ins depending on what’s in your pantry or what you’re craving that day.
- Zero baking required: Just mix, press, and chill—perfect if you want a no-fuss snack.
- Customizable mix-ins: Nuts, seeds, chocolate, or dried fruit—you name it, you can add it.
- Great grab-and-go snack: These bars are portable and keep well, so they’re perfect for busy days.
- Chewy, satisfying texture: A perfect balance of soft and crunchy that keeps you feeling full.
Ingredients & Why They Work
The magic of these no-bake granola bars is really in the ingredients. Simple pantry staples come together effortlessly to make a snack that feels homemade and wholesome. When shopping, look for quality nut butter and choose your favorite mix-ins to make the bars truly your own.
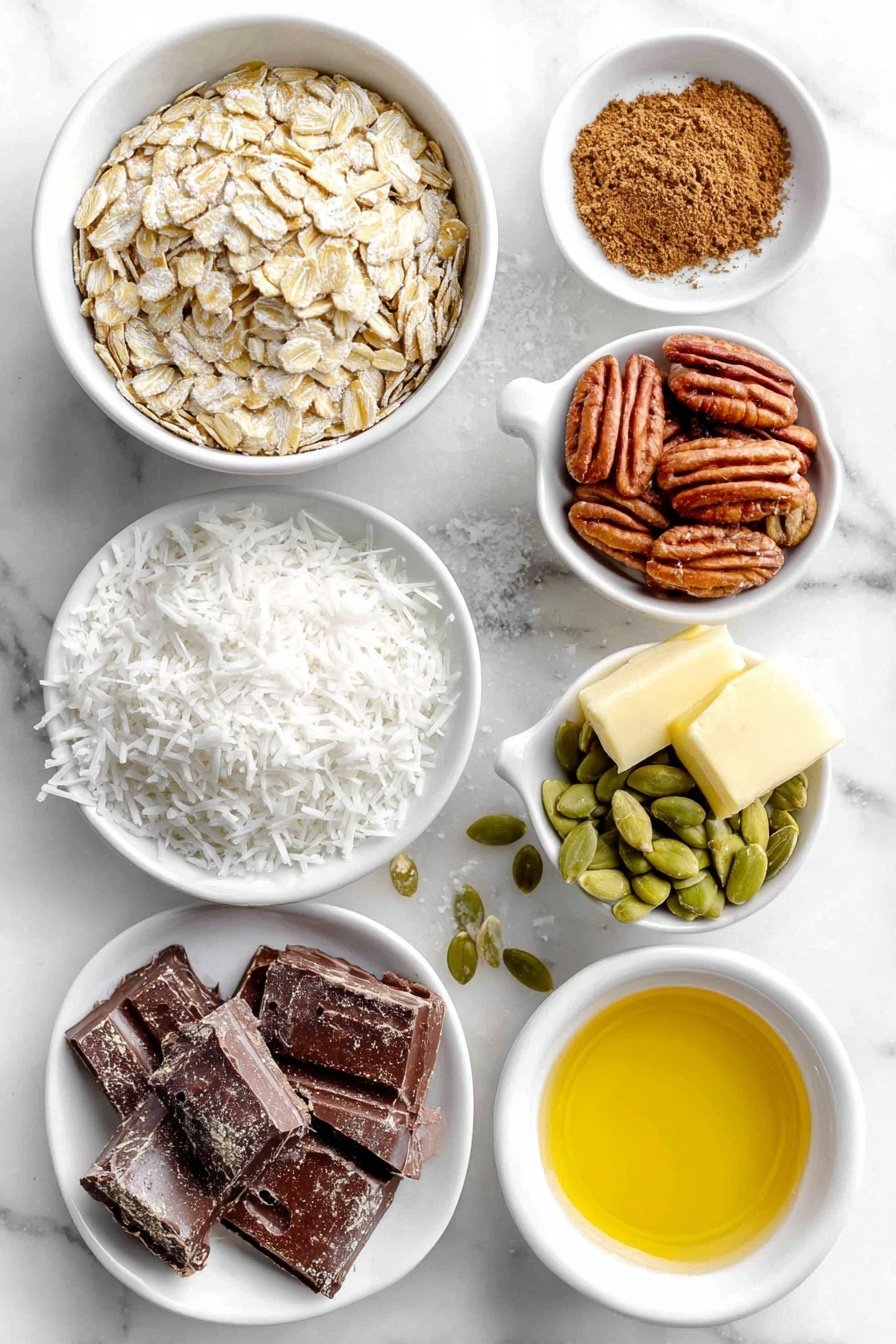
- Old-fashioned oats or quick-cooking oats: The base for structure and crunch; old-fashioned oats offer more chew while quick oats blend in smoother.
- Ground cinnamon: Adds a warm, cozy flavor that pairs beautifully with nuts and honey.
- Fine sea salt: Enhances all the flavors and balances the sweetness.
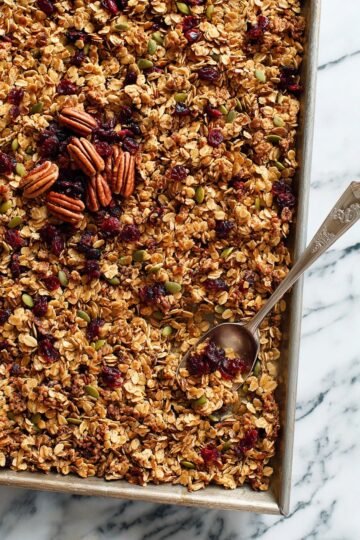
- Mix-ins (nuts, seeds, chocolate, shredded coconut, or dried fruit): The fun part—choose your favorites or what you have on hand to personalize every batch.
- Creamy peanut butter or almond butter: Acts as the glue that holds everything together with rich, nutty flavor.
- Honey or maple syrup: Natural sweeteners that add both taste and stickiness to bind ingredients.
- Vanilla extract: A small addition that gives a lovely depth and aroma to the bars.
Make It Your Way
The beauty of this No-Bake Granola Bars Recipe is just how flexible it is. Feel free to swap mix-ins, adjust sweetness, or tailor the bars to fit your dietary preferences—your snack, your rules!
- Nut-Free Variation: I love swapping peanut butter for sunflower seed butter and replacing nuts with pepitas and sunflower seeds when I’m making these for a friend with allergies. The bars still have a wonderful crunch and rich flavor without any nuts at all.
- Vegan Version: By switching honey for pure maple syrup, you get a perfect vegan-friendly bar that’s just as chewy and satisfying. I usually add a bit more vanilla extract to boost the flavor when I go vegan.
- Chocolate Lover’s Twist: Adding extra chopped dark chocolate and a sprinkle of sea salt on top before chilling is my go-to for a decadent, slightly salty-sweet bar that satisfies any chocolate craving.
- Boost the Fiber: Medjool dates blended into the wet ingredients add a naturally sweet, caramel-like depth and bump up the fiber. It takes a little extra prep with soaking, but it’s worth it for a wholesome treat!
Step-by-Step: How I Make No-Bake Granola Bars Recipe
Step 1: Prepare the Pan for Easy Removal
Start by lining a 9-inch square baking pan with two strips of parchment paper arranged criss-cross. This simple trick makes it super easy to lift the bars out later without any sticking or crumbling. I like to press the edges firmly against the base and sides so it sits nicely.
Step 2: Mix Up the Dry Ingredients
In a large bowl, combine 1 ¾ cups of oats with 1 teaspoon ground cinnamon and ½ teaspoon fine sea salt. Give them a good stir to blend those warm, cozy spices throughout the oats. Setting this aside lets you focus on prepping the mix-ins next.
Step 3: Chop the Mix-Ins to Perfect Bite Size
Using a food processor or blender, briefly pulse your 2 cups of mix-ins – whether nuts, seeds, chocolate chips, shredded coconut, or dried fruit – until they’re chopped smaller than your pinky nail. This ensures every bite has a consistent texture without giant chunks. If you don’t have a processor, finely chop by hand. Pour these into the oat mixture and stir well.
Step 4: Blend the Wet Ingredients Smoothly
In a 2-cup liquid measuring cup, stir together 1 cup creamy peanut or almond butter, ½ cup honey or maple syrup, and 1 teaspoon vanilla extract until nice and smooth. If the mixture is too stiff, gently warm it for just a few seconds until pourable—but be sure it cools to near room temperature before the next step, especially if using chocolate to prevent melting.
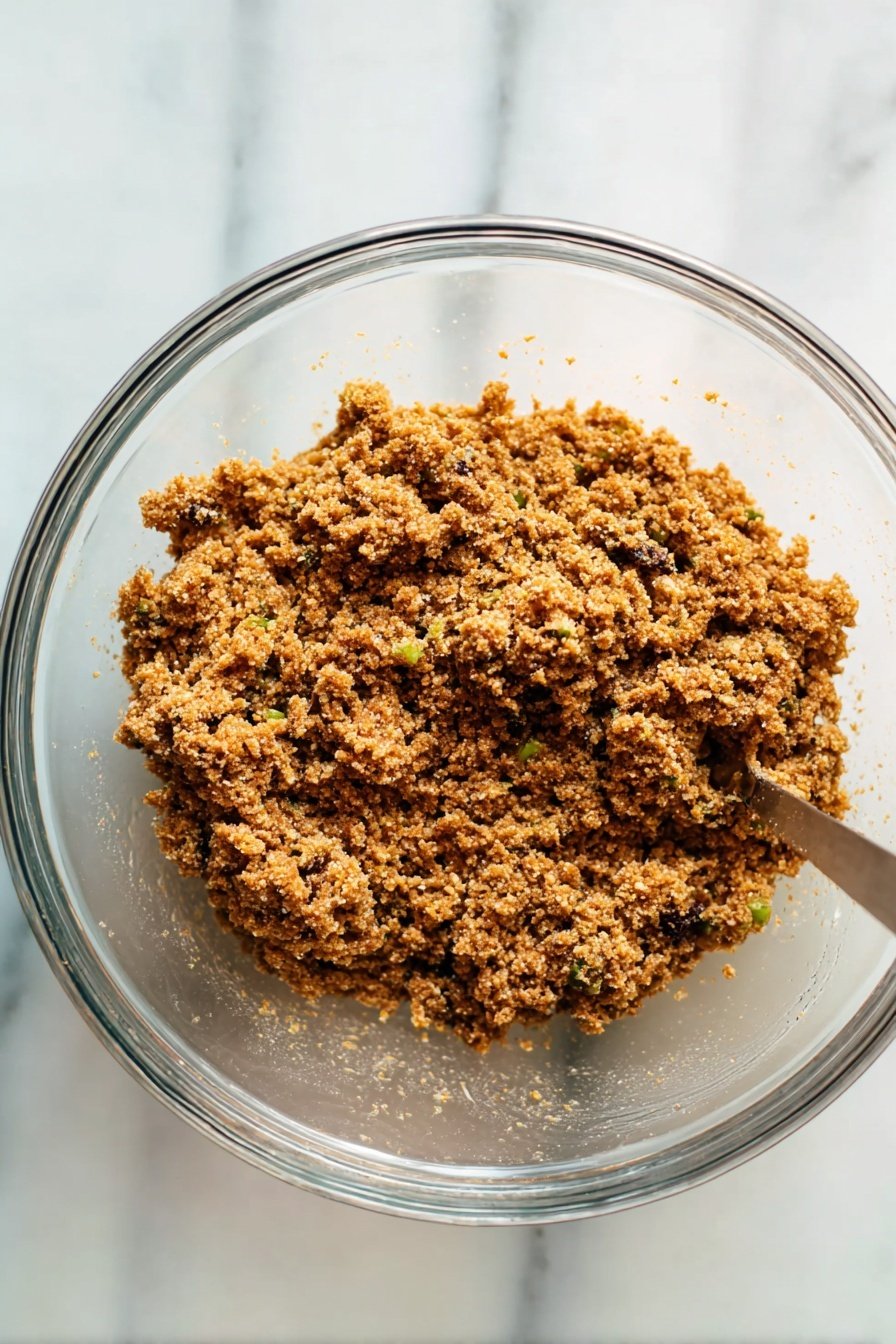
Step 5: Combine Wet and Dry for the Perfect Dough
Pour the wet ingredients into the dry and stir vigorously with a big spoon until everything is evenly coated and no dry oats remain. This part requires arm muscles, but trust me, it’s worth it! If your mixture feels too wet and doesn’t hold together, sprinkle in extra oats a tablespoon at a time until it firms up nicely.
Step 6: Pack and Press Into the Pan
Transfer the sticky mixture to your lined pan and spread it out as evenly as possible. Then, grab a flat-bottomed object—like a sturdy drinking glass—and press firmly to compact the mixture evenly from edge to edge. This helps the bars hold their shape when sliced.
Step 7: Chill to Set
Cover the pan and refrigerate the bars for at least 1 hour, or even better, overnight. This chilling period lets the oats soak up moisture and firms the bars up so they’re chewy and easy to slice without sticking.
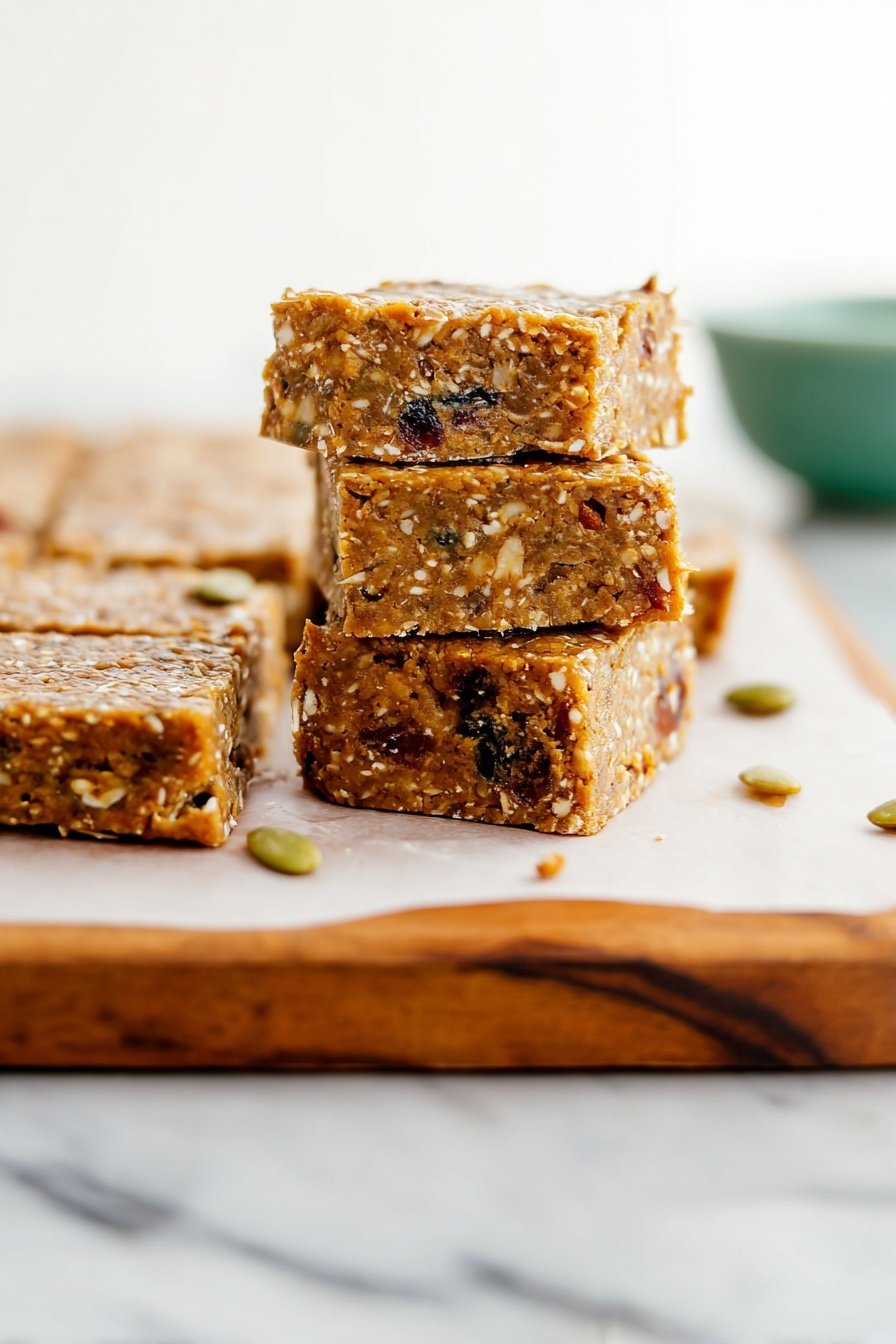
Step 8: Slice and Store Your Bars
Once chilled, lift the slab out using the parchment paper “handles” and set it on a cutting board. Using a sharp knife, slice into 4 equal rows and 4 equal columns, creating 16 perfect bars. Wrap the bars individually to prevent sticking, then store at room temperature for several days, refrigerate up to two weeks, or freeze for several months for maximum freshness.
Top Tip
Making these no-bake granola bars is wonderfully straightforward, but a few little tricks can really elevate your results and save you some kitchen hassle along the way.
- Mix-ins Prep: I learned that pulsing your nuts and other mix-ins into smaller pieces—not too fine, just smaller than your pinky nail—gives the perfect texture without overpowering any single bite.
- Room Temperature Wet Ingredients: Gently warming the nut butter and honey mixture helps everything blend smoothly, but make sure it’s cool enough before adding to dry ingredients or you risk melting any chocolate and making the bars too sticky.
- Firm Pressing: Using the bottom of a sturdy glass to press the mixture evenly and firmly into the pan ensures your bars hold together beautifully without crumbling when sliced.
- Extra Oats Adjustment: If your mix feels too wet and doesn't hold its shape well, don’t hesitate to add a handful of extra oats gradually until the texture is just right — this saves you from bars that fall apart later.
How to Serve No-Bake Granola Bars Recipe
Garnishes
While these granola bars are fantastic as-is, topping them with a drizzle of melted dark chocolate or a sprinkle of toasted coconut flakes before chilling can add a delightful touch. Fresh berries or a dusting of cinnamon on the side are also lovely accents if you're serving them as a snack or light breakfast treat.
Side Dishes
Pair your no-bake granola bars with a creamy Greek yogurt or a refreshing smoothie for a more wholesome snack or breakfast combo. A cup of herbal tea or a latte complements their sweet, nutty flavors wonderfully, making them perfect for mid-morning or afternoon pick-me-ups.
Make Ahead and Storage
Storing Leftovers
After they’ve set, wrap each bar individually in plastic wrap or parchment paper to prevent them from sticking together. You can keep them at room temperature for several days, but I find storing them in the fridge extends their freshness for up to two weeks—perfect if you want to prep snacks in advance without worry.
Freezing
For longer storage, freeze the individually wrapped bars in an airtight freezer-safe bag. They’ll keep for several months and thaw quickly at room temperature or in your lunch bag, making them excellent make-ahead treats for busy days.
Reheating
Since these are no-bake bars, reheating isn’t necessary. However, if you prefer them a little softer, let the bars sit at room temperature for 10-15 minutes before eating, or warm gently for a few seconds in the microwave to bring out the nutty flavors.
Frequently Asked Questions:
Absolutely! Swap out the peanut or almond butter for sunflower seed butter and omit any nuts in the mix-ins. Use seeds like pepitas or sunflower seeds instead for crunch and flavor.
Wrapping each bar individually in plastic wrap or parchment paper before storing them is key. This simple step prevents sticking and makes it easy to grab one on the go.
Yes! You can use maple syrup for a vegan option or experiment with a smooth date paste made from Medjool dates soaked and blended with a bit of maple syrup or honey for natural sweetness and extra fiber.
Chilling for at least one hour is necessary to let the mixture set and the oats absorb moisture. Overnight chilling is ideal but not mandatory — one hour does the trick for firm, sliceable bars.
Final Thoughts
These no-bake granola bars are one of my go-to homemade snacks because they’re so adaptable, healthy, and satisfyingly chewy without the fuss of baking. Having a batch ready in the fridge means you always have a quick energy boost at your fingertips, whether you're heading out for adventure or just need a wholesome treat to power through your day. I hope you enjoy making and sharing them as much as I do!
Print
No-Bake Granola Bars Recipe
- Prep Time: 20 minutes
- Cook Time: 0 minutes
- Total Time: 1 hour 20 minutes
- Yield: 16 bars
- Category: Snack
- Method: No-Cook
- Cuisine: American
- Diet: Vegetarian
Description
These easy no-bake granola bars are a quick and customizable snack that combines oats, nut butter, honey, and your favorite mix-ins like nuts, seeds, chocolate, and dried fruit. Perfect for a grab-and-go energy boost, they require no baking and offer a chewy, satisfying texture.
Ingredients
Dry Ingredients
- 1 ¾ cups old-fashioned oats or quick-cooking oats
- 1 teaspoon ground cinnamon
- ½ teaspoon fine sea salt
- 2 cups mix-ins (nuts, seeds, chocolate, shredded coconut or dried fruit)
Wet Ingredients
- 1 cup creamy peanut butter or almond butter
- ½ cup honey or maple syrup
- 1 teaspoon vanilla extract
Instructions
- Prepare the baking pan: Line a 9-inch square baker with two strips of criss-crossed parchment paper that fit neatly against the base and sides, making it easier to remove and slice the bars later.
- Mix dry ingredients: In a large mixing bowl, combine the oats, ground cinnamon, and sea salt, stirring well. Set aside.
- Process mix-ins: Use a food processor or blender to blitz nuts and other mix-ins briefly into smaller pieces, smaller than your pinky nail. Pour the chopped mix-ins into the bowl with the oats.
- Combine wet ingredients: In a liquid measuring cup, stir together the nut butter, honey (or maple syrup), and vanilla extract until smooth. If needed, gently warm the mixture to combine but ensure it's near room temperature before proceeding.
- Combine mixtures: Pour the wet ingredients into the dry mixture and stir thoroughly until evenly combined with no remaining dry oats. If the mixture is too wet, gradually add more oats until it holds together well.
- Press into pan: Transfer the mixture into the prepared baking pan, spreading it evenly. Use a flat-bottomed object like a sturdy drinking glass to press and compact the mixture firmly and evenly.
- Chill: Cover the pan and refrigerate for at least 1 hour or preferably overnight to allow the bars to set and for the oats to absorb moisture.
- Slice bars: Remove the chilled mixture by lifting the parchment paper, then slice into 16 bars by cutting 4 columns and 4 rows with a sharp knife.
- Store: Wrap individual bars in plastic wrap or parchment paper to prevent sticking. Store at room temperature for several days, in the fridge for a couple of weeks, or in the freezer for several months for best flavor.
Notes
- Mix-in options include any combination of nuts, seeds, chocolate chips, shredded coconut, or dried cranberries or cherries. Larger pieces should be chopped into smaller sizes for even mixing.
- For a smoother texture, pulse old-fashioned oats in a food processor for 3 to 5 seconds before mixing.
- To sweeten with Medjool dates instead of honey or syrup, soak 12 dates in hot water for 10 minutes, pit and chop, then blend with 2 tablespoons honey or maple syrup until smooth.
- Use certified gluten-free oats for a gluten-free version.
- For a nut-free version, substitute nut butter with sunflower seed butter and omit nuts, replacing with seeds like pepitas or sunflower seeds.
- For vegan bars, replace honey with maple syrup.
Nutrition
- Serving Size: 1 bar
- Calories: 190 kcal
- Sugar: 12 g
- Sodium: 80 mg
- Fat: 10 g
- Saturated Fat: 2 g
- Unsaturated Fat: 7 g
- Trans Fat: 0 g
- Carbohydrates: 20 g
- Fiber: 3 g
- Protein: 5 g
- Cholesterol: 0 mg
Leave a Reply