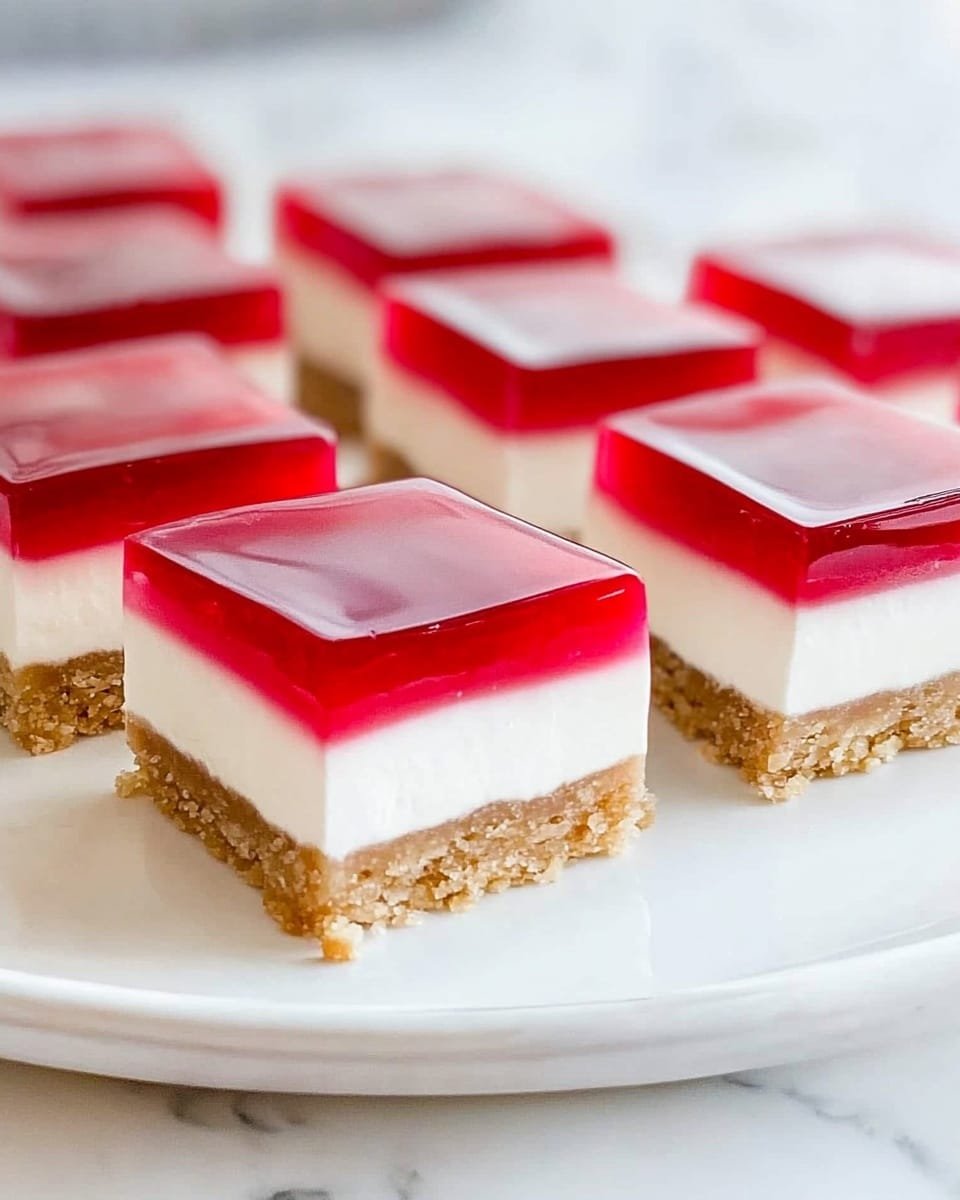
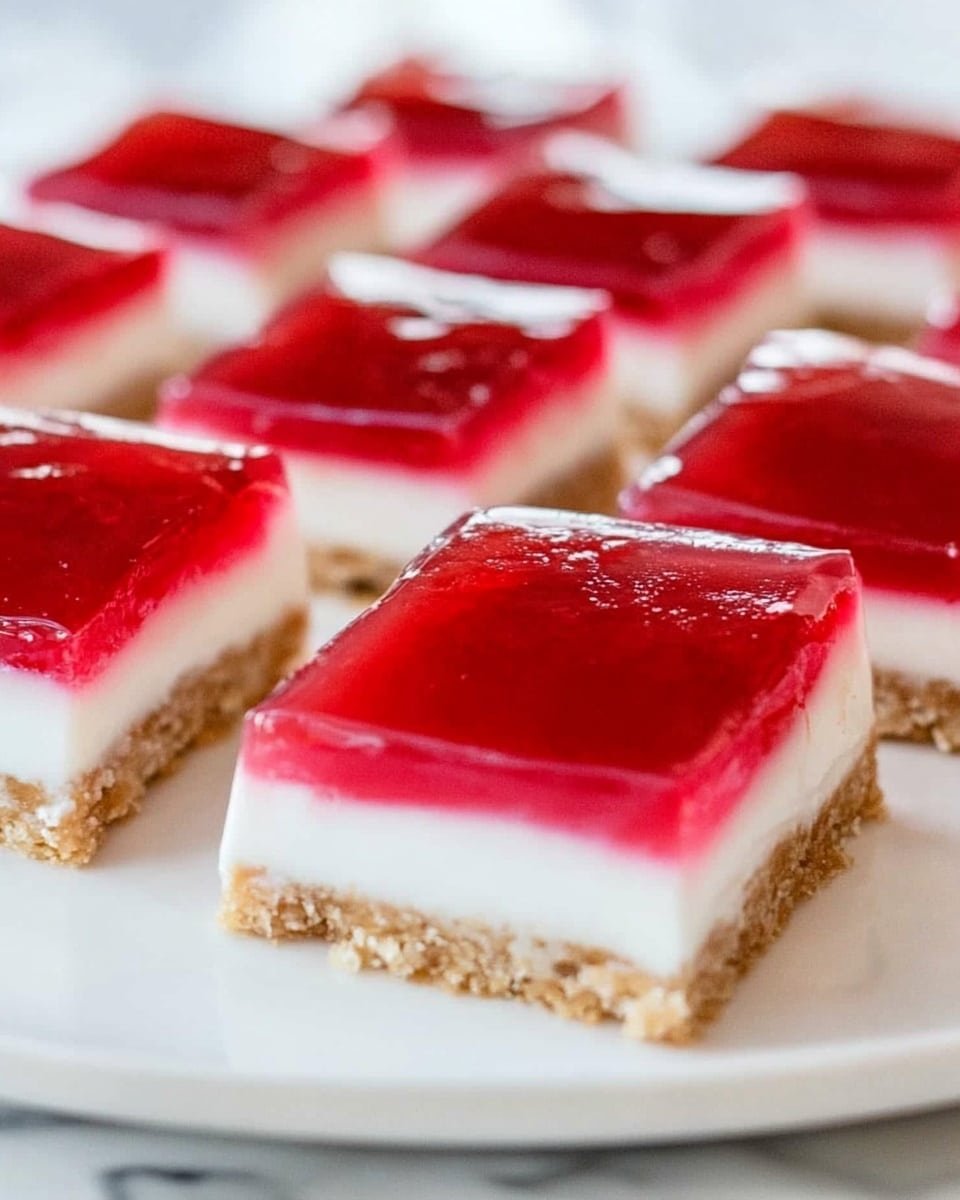
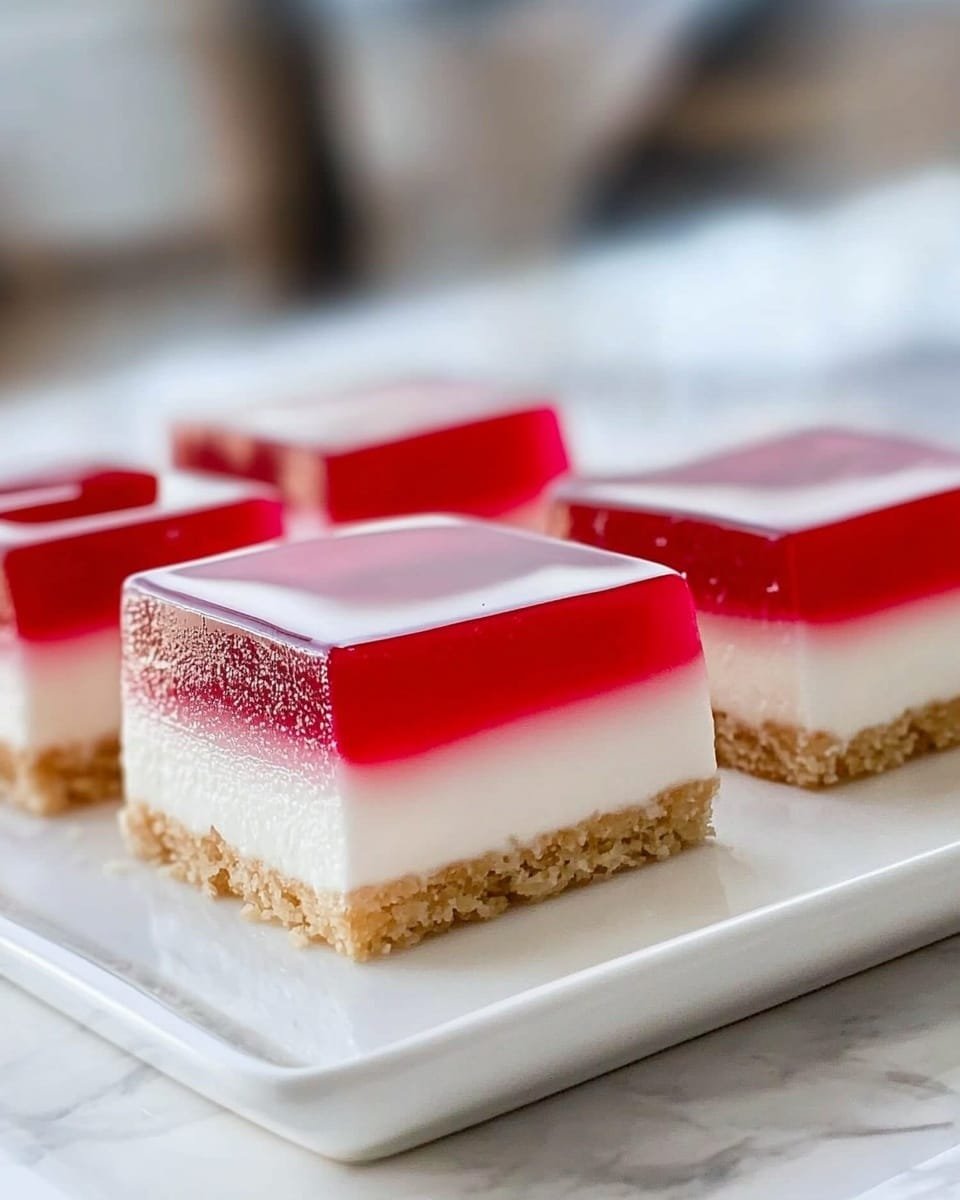
If you’re on the hunt for a nostalgic treat that’s bursting with vibrant flavors and delightful textures, this Jelly Slice Recipe is an absolute winner. It’s a classic dessert that perfectly balances a crunchy biscuit base, a creamy tangy middle layer, and a glossy jelly topping — simply irresistible and guaranteed to brighten any gathering.
Why You’ll Love This Recipe
- No-Bake Simplicity: This Jelly Slice doesn’t require an oven, making it super quick and easy to whip up anytime.
- Layers of Delight: Experience the perfect harmony between crumbly base, luscious cream, and wobbly jelly top.
- Customizable Flavors: You can swap out flavors or add extras to suit your taste — the recipe is as flexible as it is delicious.
- Crowd Pleaser: Whether it’s a family gathering or a casual party, this slice is always a hit.
Ingredients You’ll Need
The charm of this Jelly Slice Recipe lies in its simple yet thoughtful ingredients. Each one plays a key role — from the crunchy biscuits that form the sturdy base, to the sweetened condensed milk that provides creamy richness, and the fruity jelly that adds that cheerful finishing touch.
- Digestive Biscuits: Provides the perfect crumbly foundation; broken into fine crumbs for easy pressing.
- Brown Sugar: Adds subtle sweetness and depth to the biscuit layer.
- Desiccated Coconut: Offers a lovely texture and natural sweetness to the base.
- Ground Cinnamon: Adds a hint of warmth and spice, balancing the sweetness.
- Butter (melted): Binds the biscuit crumbs together, forming a firm crust.
- Sweetened Condensed Milk: The star of the creamy middle layer, rich and luscious.
- Vanilla Extract: Enhances flavor complexity of the cream layer.
- Gelatin: Key for that perfect set in both the cream and jelly layers.
- Boiling Water: Helps dissolve the gelatin smoothly.
- Lemon Juice: Adds that tangy zing, balancing the sweetness beautifully.
- Jelly Crystals: Creates the colorful, glossy top layer that everyone loves.
Note: Exact ingredients and measurements are listed in the recipe card below.
Variations
This Jelly Slice Recipe is wonderfully adaptable. Whether you want to cater to dietary preferences or simply mix up the flavor profile, making changes is super easy and fun. Get creative and make this recipe truly your own!
- Fruit-Flavored Jelly: Swap the jelly crystals for your favorite fruit flavor, like raspberry or lime, to give the slice a different twist.
- Dairy-Free Version: Use coconut condensed milk and vegan gelatin alternatives to suit dairy-free diets without compromising on taste.
- Nutty Base: Add crushed nuts like almonds or walnuts into the biscuit base for an extra crunch and nutty depth.
- Chocolate Layer: Incorporate some melted chocolate into the condensed milk step for a deliciously rich variation.
How to Make Jelly Slice Recipe
Step 1: Prepare the Biscuit Base
Begin by breaking the digestive biscuits and pulsing them in a food processor until you have fine crumbs. Then add in the melted butter, brown sugar, cinnamon, and desiccated coconut. Pulse again until the mixture comes together nicely. Press this mix firmly into the base of a lined slice tin and pop it into the fridge for about 30 minutes to set.
Step 2: Make the Creamy Middle Layer
Mix the sweetened condensed milk with vanilla extract in a jug. Soften the gelatin by whisking it into 2 tablespoons of boiling water, then stir this into the condensed milk mix. Add lemon juice and stir everything well to create that perfectly tangy and creamy filling. Pour over the chilled biscuit base and refrigerate for an hour.
Step 3: Prepare and Add the Jelly Topping
Prepare the jelly crystals as per packet instructions but reduce the amount of cold water by 100ml to ensure the jelly layer sets firmer on the slice. Let the jelly cool to room temperature before gently pouring it over the cream layer. Place the slice back into the fridge and allow it to set for at least 3 hours or until fully firm.
Pro Tips for Making Jelly Slice Recipe
- Even Base Pressure: Press the biscuit mixture firmly but evenly to avoid cracks and ensure a solid foundation.
- Gentle Jelly Pour: Pour the cooled jelly slowly over the cream layer to prevent blending or breaking through.
- Gelatin Timing: Make sure you whisk the gelatin into hot water until fully dissolved for a smooth set.
- Set Patience: Resist the urge to slice too soon; letting it chill fully keeps those perfect clean edges.
How to Serve Jelly Slice Recipe
Garnishes
Keep it simple by adding a few fresh mint leaves or edible flowers on top to bring a fresh pop of color and aroma. A light dusting of shredded coconut or finely chopped nuts can also add an inviting texture boost and beautiful finish.
Side Dishes
This treat pairs exceptionally well with a lightly brewed cup of tea or coffee to balance the sweetness. For a brunch or afternoon gathering, fresh fruit platters or light salads can complement the rich dessert without overpowering it.
Creative Ways to Present
Try cutting the jelly slice into fun shapes using cookie cutters for a whimsical touch at parties. Layering slices on pretty plates with a drizzle of berry coulis or a dollop of whipped cream makes each serving extra special and inviting.
Make Ahead and Storage
Storing Leftovers
Store any leftover Jelly Slice tightly covered in the refrigerator. It will keep its freshness and texture for up to 3 days, making it a perfect make-ahead treat for later enjoyment.
Freezing
Freezing jelly slices is generally not recommended, as the texture of the jelly layer can suffer and become watery once thawed. For best results, enjoy it fresh or refrigerated.
Reheating
Since this slice is best served chilled, reheating isn’t necessary—or recommended—as it would affect the texture. Simply allow it to come to room temperature briefly before slicing to get clean cuts.
FAQs
-
Can I use a different type of biscuit for the base?
Absolutely! While digestive biscuits give a nice mild flavor and texture, you can use graham crackers, plain sweet biscuits, or even crushed cookies like shortbread for a richer base. Just ensure they crush finely and are not too sweet as the other layers add plenty of sweetness.
-
What type of gelatin works best in this jelly slice?
Unflavored powdered gelatin works best since it sets the cream and jelly without adding extra flavor. Make sure to dissolve it fully in hot water for a smooth texture. If you prefer vegetarian options, agar-agar can be used, but the setting process and texture will differ slightly.
-
Can I make this Jelly Slice in advance?
Yes! This slice actually benefits from some time in the fridge to let all the layers fully set and the flavors meld together—making it perfect for preparing a day ahead of serving.
-
How do I get clean slices without the jelly sticking to the knife?
Use a sharp knife warmed under hot water and wiped dry before each cut. This simple trick helps the knife glide smoothly through the jelly layer without sticking or tearing.
Final Thoughts
This Jelly Slice Recipe is one of those cherished treats that never goes out of style. It’s simple, vibrant, and packed with delightful layers that’ll have everyone reaching for seconds. So why not try making it today and bring a slice of joyful nostalgia to your table? I promise it’s as fun to make as it is to eat!
PrintJelly Slice Recipe
This Jelly Slice Recipe is a delightful no-bake dessert that combines a crunchy biscuit base with a creamy condensed milk layer and a vibrant jelly topping. Perfectly balanced with sweetness and a hint of lemon, this treat is easy to prepare and sure to impress at any gathering.
- Prep Time: 5 minutes
- Cook Time: 1 minute
- Total Time: 3 hours 6 minutes
- Yield: 10 servings
- Category: Dessert
- Method: No-Cook
- Cuisine: Australian
Ingredients
Base
- 150 grams digestive biscuits, broken up
- 80 grams brown sugar
- 30 grams desiccated coconut
- 1 teaspoon ground cinnamon
- 80 grams butter, melted
Cream Layer
- 395 grams sweetened condensed milk
- 1 teaspoon vanilla extract
- 2 teaspoons gelatin
- 2 tablespoons boiling water
- 150 mls lemon juice
Jelly Topping
- 1 packet jelly crystals
- Cold water as per packet instructions (100 mls less than directed)
Instructions
- Prepare Biscuit Base: Break the digestive biscuits into a food processor and process until fine crumbs. Add melted butter, ground cinnamon, brown sugar, and desiccated coconut, then process again until the mixture comes together into a crumbly dough.
- Form Base Layer: Press the biscuit mixture firmly into the base of a lined slice tin (3.8 cm H x 19.5 cm W x 28.5 cm D). Refrigerate the base for 30 minutes to set.
- Make Cream Layer: In a jug, combine sweetened condensed milk and vanilla extract. In a separate small bowl, whisk gelatin into 2 tablespoons of boiling water until fully dissolved. Pour the gelatin mixture into the condensed milk mixture, then add lemon juice and mix well.
- Assemble Cream Layer: Pour the cream mixture over the chilled biscuit base, spreading evenly. Refrigerate for 1 hour to allow it to set.
- Prepare Jelly Layer: Prepare the jelly crystals according to the packet instructions but reduce the cold water by 100 mls. Allow the jelly to cool to room temperature without setting.
- Top with Jelly: Pour the cooled jelly mixture gently over the cream layer, ensuring an even coating. Place the slice back in the fridge and allow it to set completely for at least 3 hours before serving.
Notes
- Use a slice tin with the specified dimensions for best results in setting layers evenly.
- Do not rush chilling times to ensure the layers set properly and the dessert holds together when sliced.
- Adjust sweetness and lemon juice slightly to taste if desired.
- Gelatin must be fully dissolved to avoid lumps in the cream layer.
- Cool the jelly layer to room temperature before pouring to prevent mixing with the cream layer.
- This dessert is best served chilled and consumed within 2-3 days.

