If you’ve ever dreamed of creating your own melt-in-your-mouth treats, this Homemade Chocolate Truffles Recipe is exactly what you need. Rich, silky, and effortlessly elegant, these little bites of heaven are surprisingly simple to make and will wow anyone lucky enough to get a taste!
Why You’ll Love This Recipe
- Decadently Simple: Just a few quality ingredients come together to create truffles that taste like you bought them at a boutique chocolatier.
- Customizable Toppings: You can roll these truffles in everything from cocoa powder to crushed nuts, so the finishing touch is all yours.
- Perfect for Gifting: These truffles make heartfelt, delicious homemade gifts that anyone would love to receive.
- No-Bake Ease: There’s zero baking involved, so you can whip up a batch anytime, even when the kitchen heat isn’t your friend.
Ingredients You’ll Need
Getting your ingredients ready for this Homemade Chocolate Truffles Recipe couldn’t be easier. Each component plays a key role—quality chocolate provides the rich base, heavy cream lends that luscious smoothness, and the optional butter and vanilla pull everything together into an irresistible blend.
- Quality semi-sweet or bittersweet chocolate: Finely chopped to melt evenly for the smoothest ganache.
- Heavy cream: Simmered gently to give the truffles their creamy texture.
- Unsalted butter (optional): Adds a subtle silkiness and richness; make sure it’s softened for easy mixing.
- Pure vanilla extract (optional): A splash enhances the depth of the chocolate’s flavor.
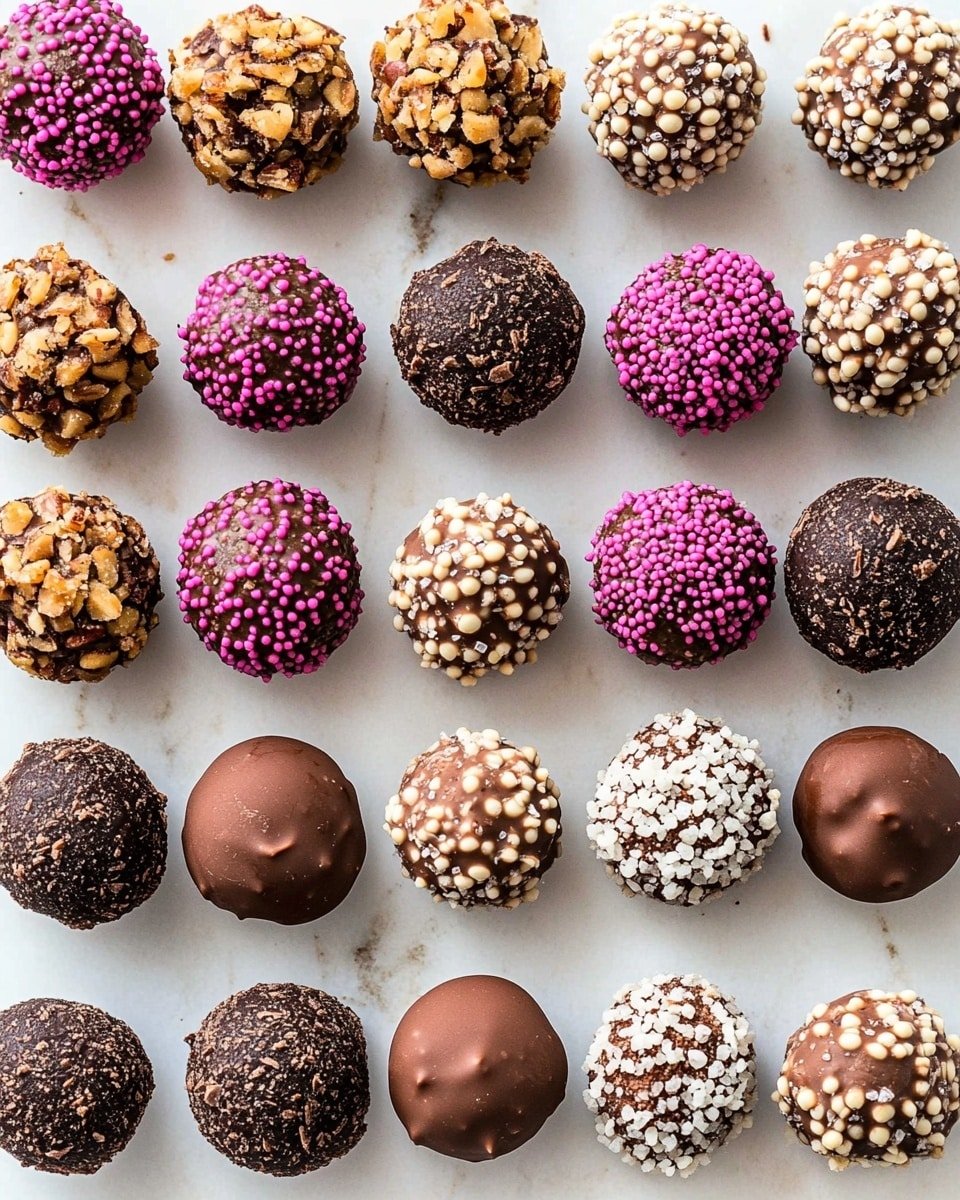
- Toppings: Unsweetened cocoa powder, sprinkles, chopped nuts, or even tempered chocolate to coat and decorate.
Note: Exact ingredients and measurements are listed in the recipe card below.
Variations
One of the best parts about making your own truffles is how easy it is to make the recipe yours. Whether you want to mix in new flavors or adjust for dietary preferences, this Homemade Chocolate Truffles Recipe adapts beautifully.
- Spiced Chocolate Truffles: Add a pinch of cinnamon or chili powder to the ganache for a little unexpected warmth and zing.
- Nutty Bliss: Mix finely chopped toasted nuts like hazelnuts or almonds right into the truffle mixture for texture and flavor pops.
- Dairy-Free Alternative: Swap heavy cream for canned coconut milk and use dairy-free chocolate to make vegan-friendly truffles.
- Flavored Extracts: Experiment with peppermint, orange, or almond extract instead of vanilla for a unique twist.
How to Make Homemade Chocolate Truffles Recipe
Step 1: Prep Your Chocolate
Start by placing your finely chopped chocolate into a heat-proof bowl. This is the foundation of your truffles, so using high-quality chocolate will make all the difference in creating that irresistible silky texture and rich flavor.
Step 2: Heat the Cream
Gently heat the heavy cream until it just begins to simmer — this will help melt the chocolate evenly without burning it. You can either warm it up in a saucepan on the stove or use the microwave for convenience.
Step 3: Combine and Chill
Pour the hot cream over the chocolate (and softened butter if using), letting the mixture sit without stirring for about 5 minutes. This resting period allows the chocolate to melt fully. Stir until smooth and glossy, then add vanilla extract for an extra layer of flavor. Press plastic wrap directly onto the surface and chill in the refrigerator for 1 to 2 hours until the ganache is firm enough to scoop.
Step 4: Scoop and Shape
Once chilled, scoop the mixture into small mounds (a 2 teaspoon-sized scoop works perfectly). Roll each mound gently between your hands to form round balls. It can feel a bit sticky, but that’s normal and part of the fun!
Step 5: Coat and Enjoy!
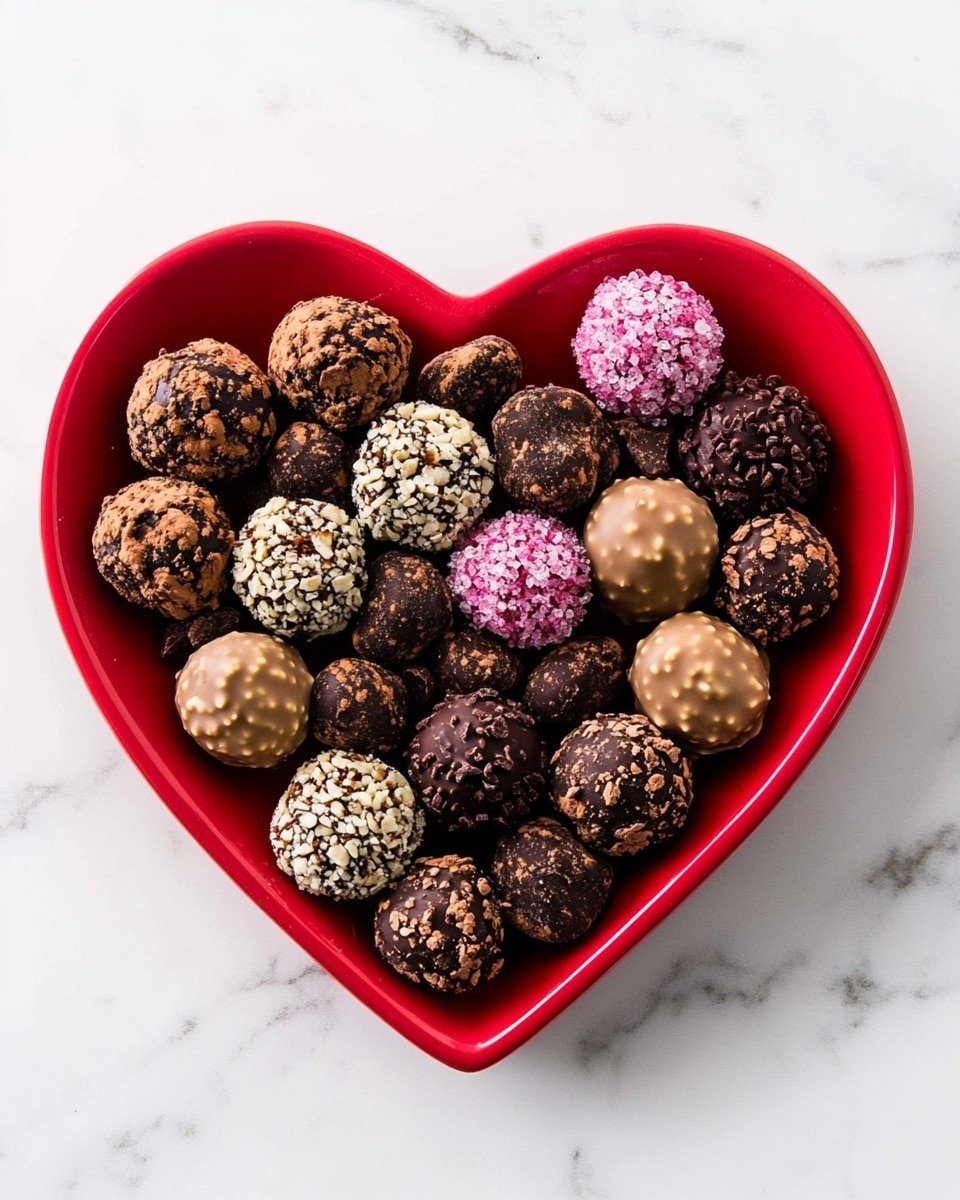
Now comes the fun part: rolling your truffles in toppings. Whether unsweetened cocoa powder, crushed nuts, or colorful sprinkles — each coating adds its own charm. For a professional touch, try dipping them in melted chocolate for a glossy finish. Let them come to room temperature before serving to unlock their full creamy decadence.
Pro Tips for Making Homemade Chocolate Truffles Recipe
- Use Quality Chocolate: The smoother and better the chocolate, the richer your truffles will taste—always choose chocolate with at least 60% cocoa content.
- Chill Properly: Don’t rush cooling the ganache; proper chilling makes scooping and shaping easier and cleaner.
- Work Quickly with Your Hands: Warm hands can soften truffles too much, so if they become sticky, briefly chilling the mixture can help.
- Avoid Condensation: Placing plastic wrap directly on the ganache prevents water droplets that can affect the texture and shelf-life.
How to Serve Homemade Chocolate Truffles Recipe
Garnishes
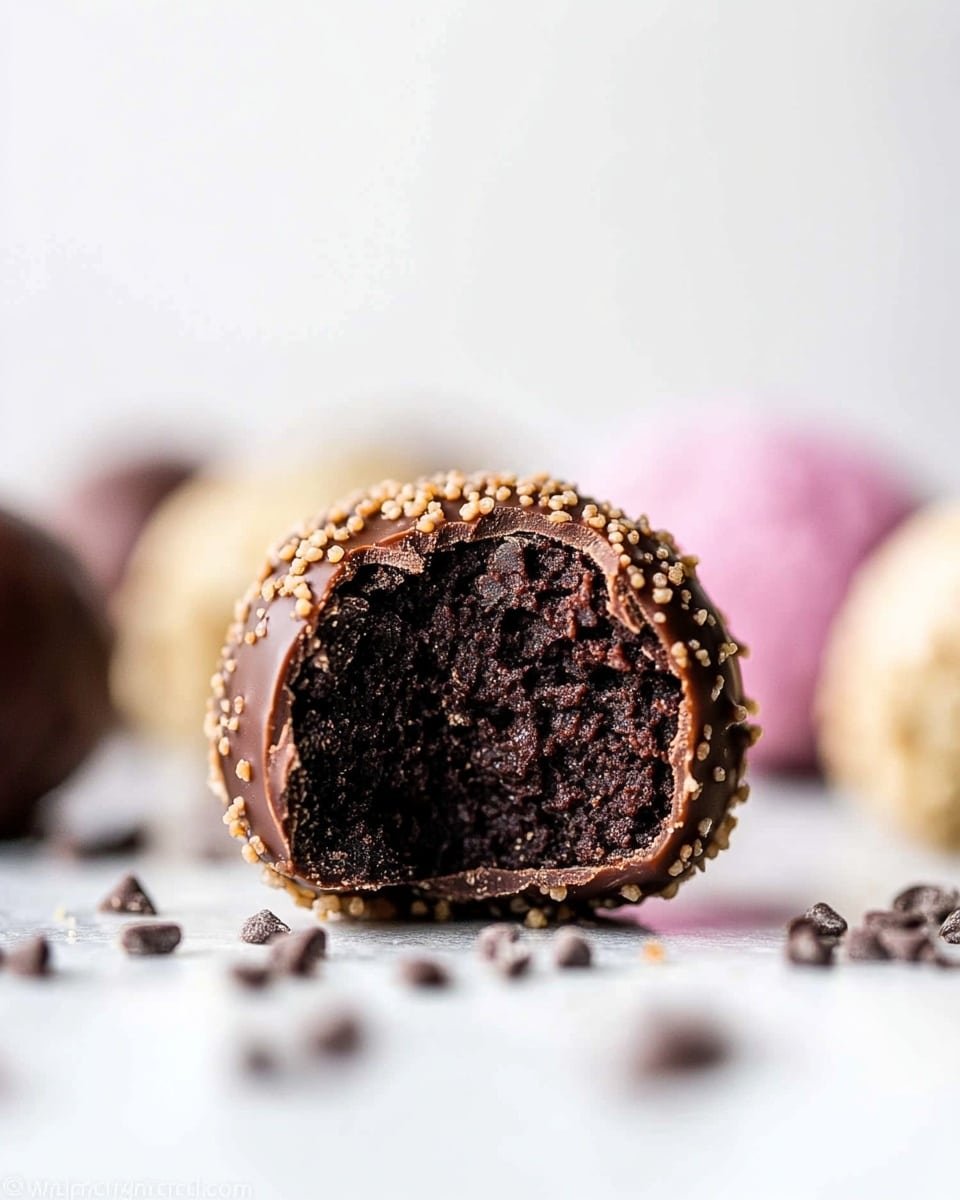
Garnishing your truffles adds character and flair! A simple dusting of perfectly sifted cocoa powder provides deep chocolate notes, while crushed toasted nuts add delightful crunch. Sprinkles or edible gold dust make truffles festive and eye-catching—perfect for celebrations or gifts.
Side Dishes
This recipe’s rich and creamy nature makes these truffles stand out beautifully alongside a hot espresso, a glass of dessert wine, or fresh berries. They make an impeccable finish to any special meal or a luxe snack with afternoon tea.
Creative Ways to Present
Presentation is half the fun! Place your truffles in decorative mini cupcake liners or stack them in a pretty jar layered with parchment paper for unique gifting. You can even arrange a truffle platter adorned with edible flowers or fresh mint leaves for an elegant party centerpiece.
Make Ahead and Storage
Storing Leftovers
Once made, your truffles can be stored in an airtight container at room temperature for 3-4 days, keeping their texture perfectly creamy. If your kitchen is warm, the refrigerator is a safe bet, extending freshness up to 2 weeks.
Freezing
For longer storage, freeze your truffles in a single layer wrapped in parchment inside an airtight container. They keep well for up to 3 months—just thaw overnight in the fridge before serving to preserve their luscious texture.
Reheating
These truffles are best enjoyed at room temperature, so after chilling or freezing, simply let them sit out for about 20 minutes before serving to bring out their full, creamy goodness without melting.
FAQs
-
Can I use milk chocolate for the truffles?
While you can use milk chocolate, it will produce a sweeter and less intense truffle. Semi-sweet or bittersweet chocolates with a higher cocoa content create the best rich, balanced flavor and smooth texture.
-
How do I prevent the truffles from sticking to my hands?
Chill the ganache well before scooping and use a small cookie scoop to portion. If the truffle mixture feels sticky when rolling, pop your hands in cold water briefly or dust them lightly with cocoa powder to reduce stickiness.
-
What’s the best way to store homemade truffles long-term?
For longer storage, freezing is ideal. Arrange truffles in a single layer on parchment paper inside an airtight container, and freeze for up to 3 months. Always thaw them slowly in the refrigerator before serving.
-
Can I add flavors like liqueur or spices?
Absolutely! Mixing in a tablespoon of liqueur such as Grand Marnier or Kahlúa during the ganache stage adds a sophisticated twist. Spices like cinnamon, chili, or espresso powder can be stirred in as well—all enhance the flavor beautifully.
Final Thoughts
Taking a little time to make this Homemade Chocolate Truffles Recipe is truly a joyful experience. From the silky ganache to the endless topping possibilities, every bite is pure bliss. I can’t wait for you to share these at your next gathering or enjoy a quiet indulgence all for yourself. Go ahead—treat yourself to some homemade magic!
PrintHomemade Chocolate Truffles Recipe
Indulge in these classic homemade chocolate truffles made with rich semi-sweet chocolate, heavy cream, and optional butter and vanilla for extra smoothness and flavor. Finished with your choice of toppings like cocoa powder, sprinkles, or crushed nuts, these decadent treats require no cooking beyond heating the cream and chilling, making them elegant and easy to prepare for any occasion.
- Prep Time: 2 hours 30 minutes
- Cook Time: 0 minutes
- Total Time: 2 hours 30 minutes
- Yield: 20-24 truffles
- Category: Dessert
- Method: No-Cook
- Cuisine: French
Ingredients
Truffle Mixture
- two 4–ounce quality semi-sweet or bittersweet chocolate bars (226g), very finely chopped
- 2/3 cup (160ml) heavy cream
- optional: 1 Tablespoon (14g) unsalted butter, softened to room temperature
- optional: 1/2 teaspoon pure vanilla extract
Toppings
- unsweetened cocoa powder
- sprinkles
- crushed nuts
- melted or tempered chocolate
Instructions
- Prepare Chocolate: Place the finely chopped chocolate in a heat-proof bowl and set it aside, ready for the warm cream to be added.
- Heat Cream: Heat the heavy cream until it just begins to simmer, either on the stove or in the microwave, ensuring it is hot enough to melt the chocolate.
- Combine and Melt: Add the softened butter to the chocolate if using. Pour the hot cream evenly over the chocolate and let it sit undisturbed for 5 minutes. Add the vanilla extract, then stir gently until the chocolate is fully melted and the mixture is smooth and glossy. Cover the surface with plastic wrap to prevent condensation.
- Chill Mixture: Refrigerate the chocolate mixture for 1-2 hours in a shallow dish (an 8-inch square pan works well) so it sets evenly and becomes firm enough to scoop.
- Scoop and Shape: Using a small cookie scoop or spoon, form 2 teaspoon-sized mounds (or 1 tablespoon for larger truffles) of the chilled mixture, rolling each between your hands to create smooth balls. Note that the mixture may be sticky—lightly chilling the mixture again or coating hands with cocoa powder can help.
- Add Toppings: Roll the truffle balls in your choice of unsweetened cocoa powder, sprinkles, crushed nuts, or dip them in melted or tempered chocolate for extra indulgence.
- Serve and Store: Let truffles come to room temperature before serving for optimal flavor and texture. Store tightly covered at room temperature for up to 3-4 days, or refrigerate for up to 2 weeks.
Notes
- For the best flavor, use high-quality semi-sweet or bittersweet chocolate with at least 60% cacao.
- Heating the cream to just simmering temperature prevents scorching and ensures smooth melting of the chocolate.
- Covering the chocolate mixture with plastic wrap directly on the surface prevents a skin from forming during chilling.
- Scooping and rolling the truffles can be sticky—chilling the mixture a bit more or dusting hands with cocoa powder helps.
- Truffles taste best when allowed to come to room temperature before enjoying.
- Store truffles in a cool place away from direct sunlight to maintain texture and flavor.

