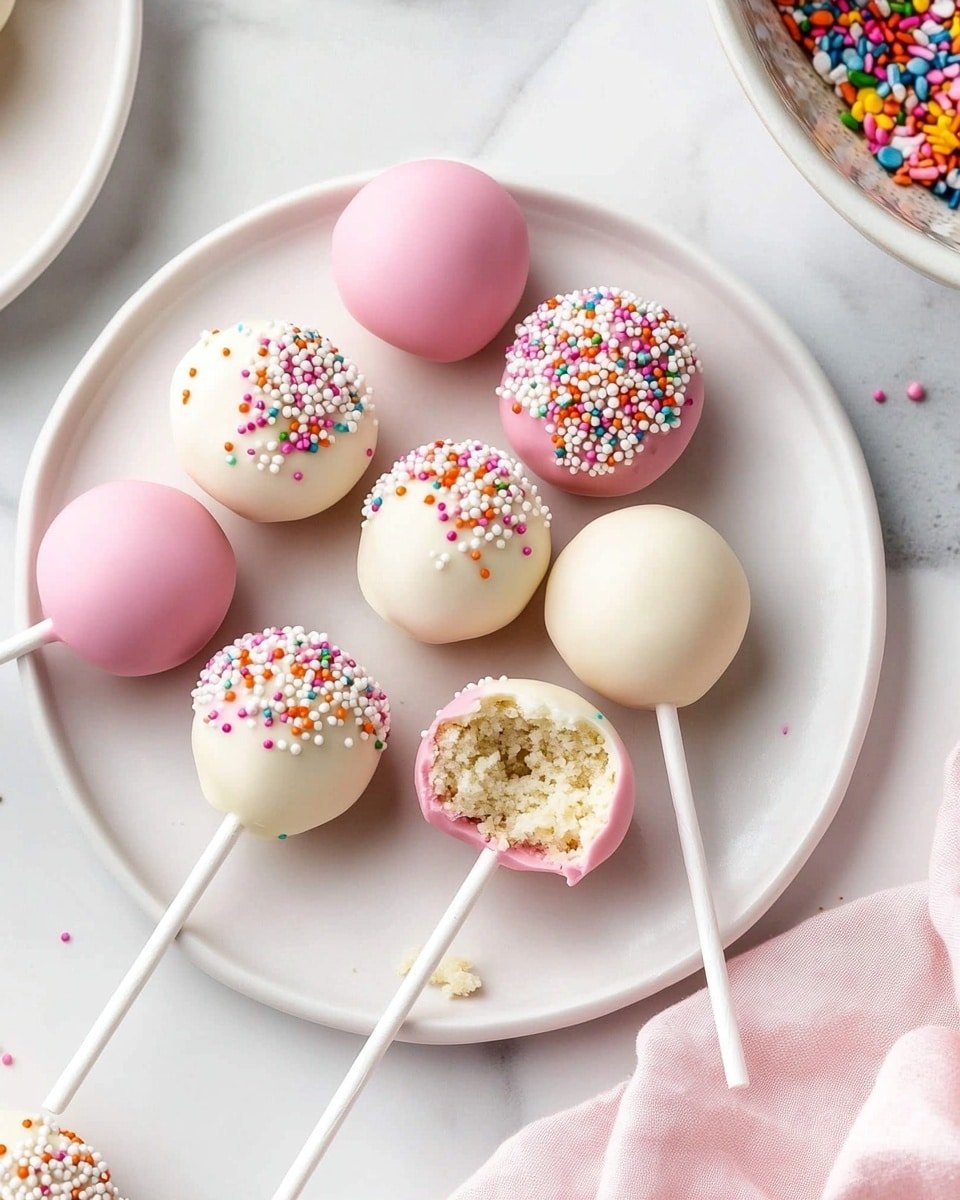
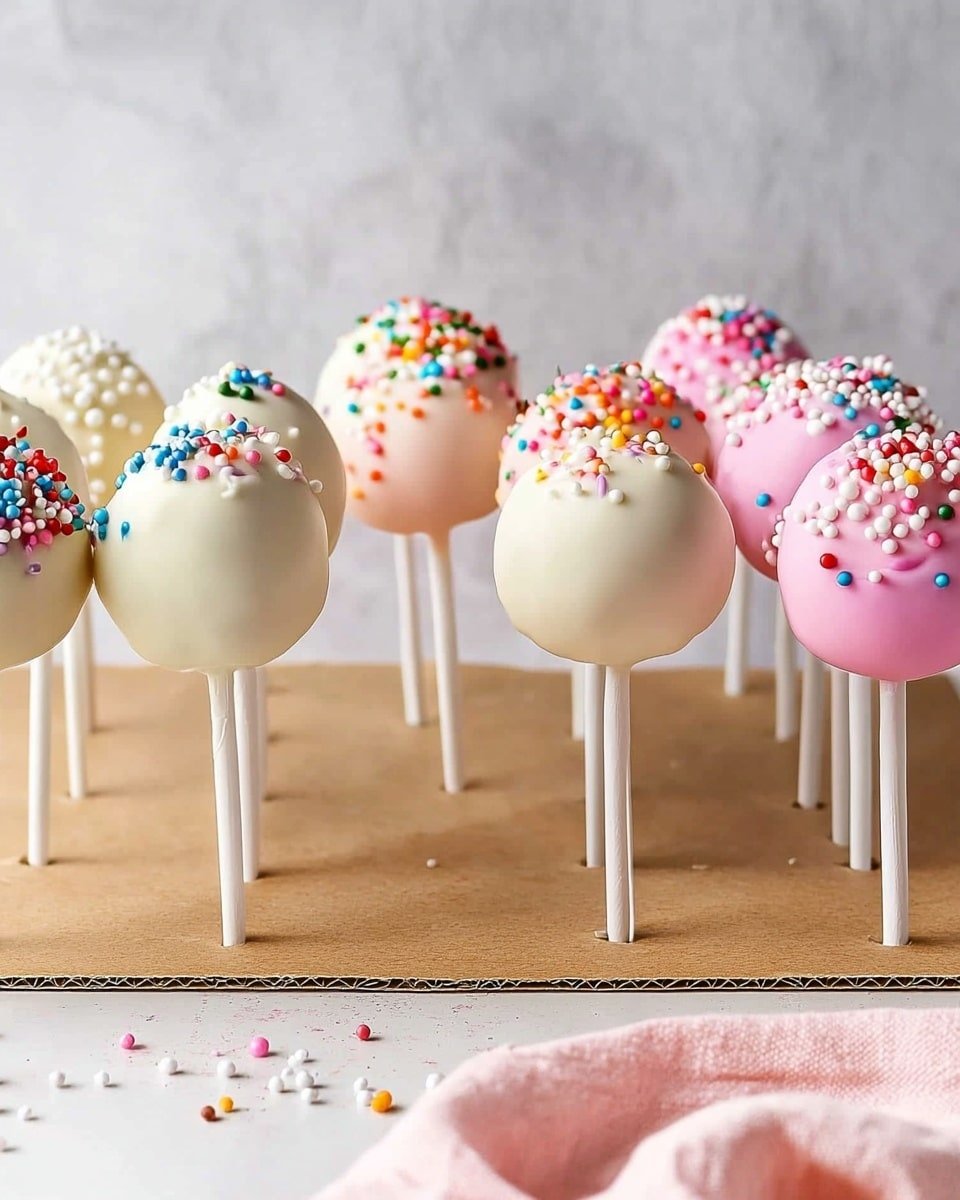
If you’ve ever wanted a fun and adorable treat that tastes just like celebration in every bite, you’re going to adore this Homemade Cake Pops Recipe. These delightful little cake bites are coated in smooth candy melts and decorated with sprinkles, making them perfect for parties, gifts, or whenever you need a little sweet pick-me-up. Trust me, once you try making these, you’ll wonder why you ever bought cake pops instead of crafting your own!
Why You’ll Love This Recipe
- Ultra-Creative and Fun: Cake pops are the perfect interactive dessert that everyone loves to decorate and eat.
- Make-Ahead Friendly: You can prep most of the steps ahead of time, making party planning a breeze.
- Customizable Flavors & Designs: Easily switch up coatings and decorations to fit any occasion or favorite flavor.
- Perfect Portion Control: These little bites are just the right size for a sweet treat without overindulging.
Ingredients You’ll Need
Making this Homemade Cake Pops Recipe starts with a handful of simple, classic baking ingredients – staples you likely already have in your kitchen! Each ingredient brings its magic to the cake’s tender crumb, rich buttercream frosting, or the glossy candy coating that makes these pop-worthy.
- All-purpose flour: Provides the perfect structure and crumb for the cake base.
- Baking powder & baking soda: Give your cake a nice rise and light texture.
- Unsalted butter: Adds richness and moisture to the cake and frosting.
- Granulated sugar: Sweetens and helps make the cake tender.
- Egg and vanilla extract: Bind everything together and infuse lovely flavor.
- Whole milk (or buttermilk): Keeps the batter smooth and the cake moist.
- Confectioners’ sugar: Essential for that creamy, dreamy frosting.
- Candy melts or white chocolate: The magic coating that makes these cake pops so irresistible and easy to decorate.
- Sprinkles: The fun finishing touch to give your pops personality and flair!
Note: Exact ingredients and measurements are listed in the recipe card below.
Variations
One of my favorite things about this Homemade Cake Pops Recipe is how easy it is to make it your own! With just a handful of tweaks, you can tailor these little treats to match any flavor craving or dietary preference.
- Chocolate Cake Pops: Use chocolate cake mix or add cocoa powder to the batter for a rich dreamy twist.
- Fruit-Flavored Pops: Fold in finely chopped berries or citrus zest to the batter or frosting for a fresh burst of flavor.
- Vegan/Dairy-Free: Swap the butter for coconut oil and use plant-based milk for a dairy-free version.
- Gluten-Free: Use a 1:1 gluten-free flour blend in place of all-purpose flour to make these pops gluten-friendly.
How to Make Homemade Cake Pops Recipe
Step 1: Bake the Cake Base
Start by preheating your oven to 350°F (177°C) and greasing a 9-inch springform pan. Mix together the dry ingredients – flour, baking powder, baking soda, and salt – to ensure even rising and flavor. In a separate bowl, cream the softened butter and sugar until light and fluffy, then add the egg and vanilla. Slowly mix in the dry ingredients alternately with milk for a smooth batter, pour into your pan, and bake until a toothpick comes out clean. Cooling your cake completely in the pan is key here, so patience is your secret weapon!
Step 2: Whip Up the Vanilla Frosting
To make the frosting, beat softened butter until creamy, then slowly add confectioners’ sugar, heavy cream, and vanilla extract until everything is beautifully combined and fluffy. This frosting will be the glue for your cake crumbs, creating the perfect consistency for forming those adorable cake balls.
Step 3: Combine Cake and Frosting
Once your cake is completely cooled, crumble it into a large bowl. Add the frosting and gently mix until the cake and frosting blend together into a smooth, moldable mixture. This is where the magic happens – finding that perfect, tacky texture that holds together but isn’t too sticky.
Step 4: Shape and Chill Cake Balls
Scoop about 1 tablespoon of the cake mixture at a time and roll into smooth balls. Place them on a lined baking sheet, then chill in the fridge for 2 hours or pop them in the freezer for about an hour to set their shape. If any balls lose their shape, simply re-roll them before coating them.
Step 5: Coat with Candy Melts
Melt your candy melts or white chocolate in short bursts in the microwave, stirring well between each to get a smooth, glossy coating perfect for dunking. Dip the ends of lollipop sticks into the candy melts, then insert halfway into each chilled cake ball. Finally, dip the entire ball into the melted coating, tapping off the excess before decorating with your favorite sprinkles. Place your finished pops upright in a foam block and let them set at room temperature or in the fridge.
Pro Tips for Making Homemade Cake Pops Recipe
- Chill for Perfection: Always make sure your cake balls are very cold before dipping to avoid cracking or melting.
- Don’t Overmix: When combining frosting and cake crumbs, mix gently to maintain a tender texture.
- Use a Liquid Measuring Cup: Melting candy melts in these makes dipping easier and less messy.
- Perfect Stick Placement: Insert the stick halfway to keep cake pops secure and balanced.
How to Serve Homemade Cake Pops Recipe
Garnishes
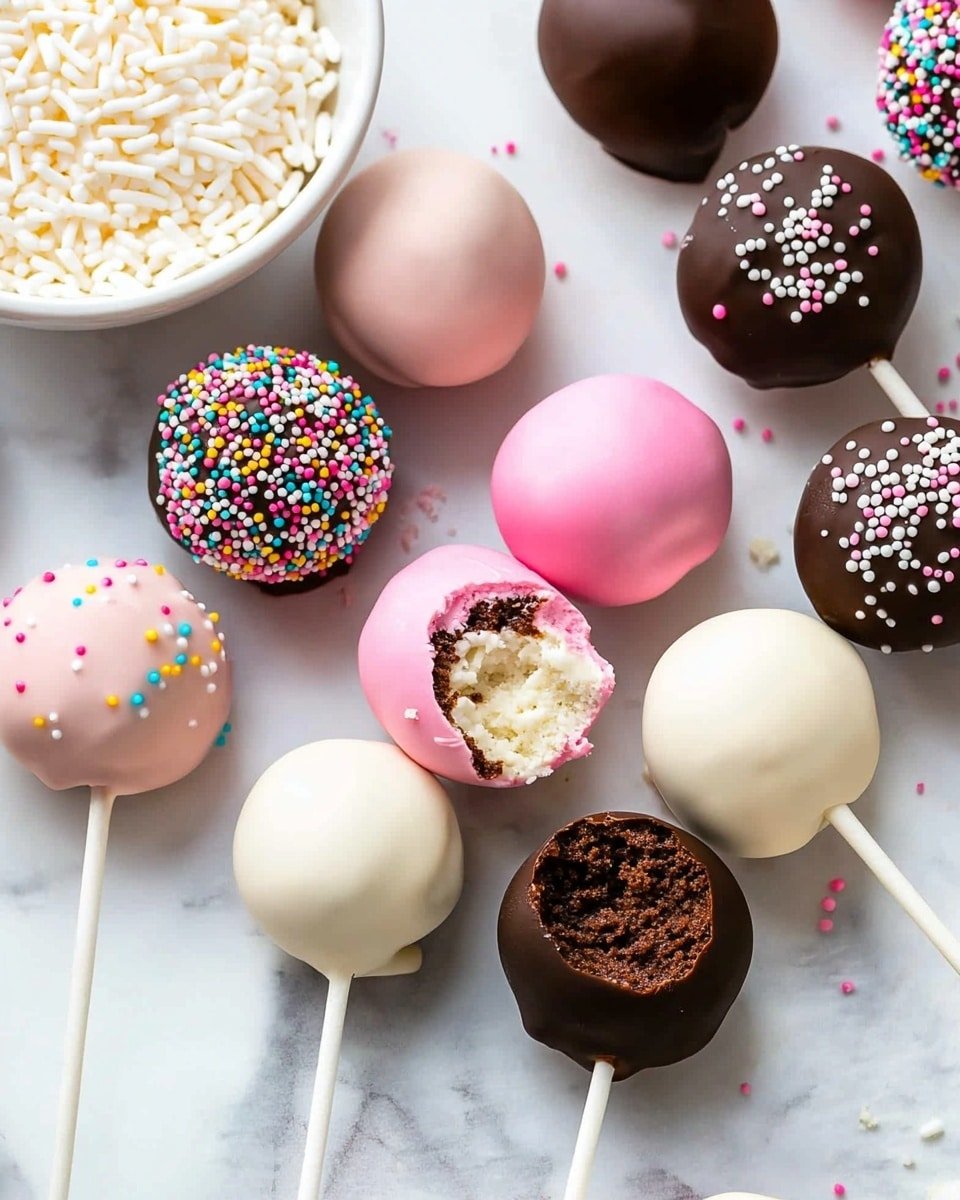
Sprinkles are the classic choice to garnish your cake pops, but you can get super creative here! Think edible glitter, crushed nuts, mini chocolate chips, or even a drizzle of contrasting colored candy melts. Garnishes add personality and bring a pop of color that makes these treats irresistibly festive.
Side Dishes
Cake pops are delightful on their own, but if you’re serving a dessert spread, pair them with fresh fruit, a creamy yogurt dip, or even a scoop of vanilla ice cream. Their bite-sized nature makes them great finger food that pairs well with a cup of coffee or a glass of sparkling cider.
Creative Ways to Present
Display your cake pops upright in a styrofoam block wrapped in decorative paper or a festive box for a charming gift idea. You can also arrange them in small mason jars filled with colored sugar or use edible flower petals around the base for an elegant touch. Presentation is half the fun and totally Instagram-worthy!
Make Ahead and Storage
Storing Leftovers
Keep your homemade cake pops fresh by storing them in an airtight container in the refrigerator. They’ll stay delicious for up to one week. Just make sure to keep them upright to avoid smudging or damage to the coating and decorations.
Freezing
You can freeze these cake pops to enjoy later! Place them on a baking sheet in a single layer and freeze until solid, then transfer to a freezer-safe container or plastic bag. They hold up well in the freezer for about two months—perfect for prepping ahead for a party or gift.
Reheating
Since cake pops are best enjoyed chilled or at room temperature, reheating isn’t recommended. Instead, if frozen, just thaw them in the refrigerator for a few hours or at room temperature for 30–60 minutes before serving.
FAQs
-
Can I use a store-bought cake instead of baking from scratch?
Absolutely! You can crumble your favorite boxed cake or homemade cake to make these pops. Just be sure the cake is fresh and cool before mixing with frosting.
-
What if my cake pops crack when dipping?
Cracking usually happens when the cake balls are too warm or the coating is too thick and stiff. Chill the cake balls thoroughly before dipping and make sure your candy melts are smooth and warm but not hot.
-
How do I store leftover cake pops without ruining the coating?
Store cake pops upright in an airtight container in the fridge. Avoid stacking or piling them to prevent smudging or cracking of the coating.
-
Can I substitute candy melts with chocolate?
Yes, good-quality white or milk chocolate bars can work great for coating. Just be sure to temper or melt gently to avoid seizing or burning.
Final Thoughts
Making this Homemade Cake Pops Recipe is such a joyful experience, whether you’re baking for a special occasion or just craving a playful sweet treat. These vibrant little bites never fail to bring smiles and a touch of whimsy to any gathering. So, grab your mixing bowls and candy melts, and get ready to create a batch that’s as charming as it is delicious!
PrintHomemade Cake Pops Recipe
This delightful recipe teaches you how to make irresistible homemade cake pops with a moist vanilla cake base, creamy frosting, and a smooth candy coating. Perfect for parties, gifts, or a fun baking project, these cake pops combine classic flavors with colorful decorations for a treat everyone will love.
- Prep Time: 2 hours
- Cook Time: 36 minutes
- Total Time: 7 hours
- Yield: 40 pops
- Category: Dessert
- Method: Baking
- Cuisine: American
Ingredients
Cake
- 1 and 2/3 cups (209g) all-purpose flour (spooned & leveled)
- 1/2 teaspoon baking powder
- 1/4 teaspoon baking soda
- 1/2 teaspoon salt
- 1/2 cup (8 Tbsp; 113g) unsalted butter, softened to room temperature
- 1 cup (200g) granulated sugar
- 1 large egg, at room temperature
- 2 teaspoons pure vanilla extract
- 1 cup (240ml) whole milk (or buttermilk)
Frosting
- 7 Tablespoons (99g) unsalted butter, softened to room temperature
- 1 and 3/4 cups (210g) confectioners’ sugar
- 2-3 teaspoons heavy cream or whole milk
- 1 teaspoon pure vanilla extract
Coating
- 24 ounces (678g) candy melts (or white chocolate bars)*
- sprinkles
Instructions
- Preheat and Prepare Pan: Preheat your oven to 350°F (177°C) and grease a 9-inch springform pan thoroughly to prevent sticking.
- Mix Dry Ingredients: In a medium bowl, whisk together the flour, baking powder, baking soda, and salt. Set this mixture aside.
- Cream Butter and Sugar: Using a handheld or stand mixer fitted with a paddle or whisk attachment, beat the softened butter and granulated sugar together in a large bowl for about 3 minutes until light and fluffy.
- Add Egg and Vanilla: Add the egg and vanilla extract to the creamed mixture and beat on high speed until fully combined. Scrape down the bowl’s sides and bottom as needed to ensure even mixing.
- Combine Wet and Dry Ingredients: Add the dry ingredients alternately with the milk to the wet mixture, mixing on low speed until just combined. Stir gently with a spatula to remove any lumps, ensuring a smooth batter.
- Bake the Cake: Pour the batter into the prepared springform pan, spreading evenly. Bake for 30–36 minutes or until a toothpick inserted in the center comes out clean. If the top browns too quickly, tent loosely with foil.
- Cool Cake: Allow the cake to cool completely in the pan on a wire rack before proceeding.
- Make Frosting: Beat the butter on medium speed until creamy (about 2 minutes). Add confectioners’ sugar, heavy cream, and vanilla extract; mix on low speed to combine, then increase to high speed and beat for 3 minutes until fluffy.
- Combine Cake and Frosting: Crumble the cooled cake into the bowl with frosting. Mix on low speed until fully combined into a uniform mixture without lumps.
- Form Cake Balls: Scoop about 1 tablespoon (20g) of the cake mixture and roll into a smooth ball. Place on a lined baking sheet. Chill in the refrigerator for 2 hours or freeze for 1 hour until firm. Re-roll if necessary and return to the fridge.
- Melt Coating: Melt candy melts or white chocolate in a microwave-safe 2-cup measuring cup in 20-second intervals, stirring between each until smooth. Alternatively, use a double boiler on the stove.
- Assemble Cake Pops: Dip the tip of a lollipop stick into the melted coating about 1/2 inch, then insert halfway into a chilled cake ball. Dip the ball fully into the coating, tapping gently to remove excess. Decorate with sprinkles and place upright into a styrofoam block or box. Repeat with remaining cake balls, working in small batches to keep them cold.
- Set Coating and Store: Allow the coating to set at room temperature for about an hour. Store the finished cake pops in the refrigerator for up to one week.
Notes
- Make sure cake balls are very cold before dipping to ensure coating adheres well and sets properly.
- If the cake starts browning too fast during baking, cover loosely with foil to prevent over-browning.
- You can substitute buttermilk for whole milk to add slight tang and tenderness to the cake.
- Use a 2-cup liquid measuring cup for melting the coating as it makes dipping easier and less messy.
- Store cake pops upright in a styrofoam block or similar container to maintain shape while coating sets.
- Re-roll chilled cake balls if they become irregular before dipping for a smooth finish.

