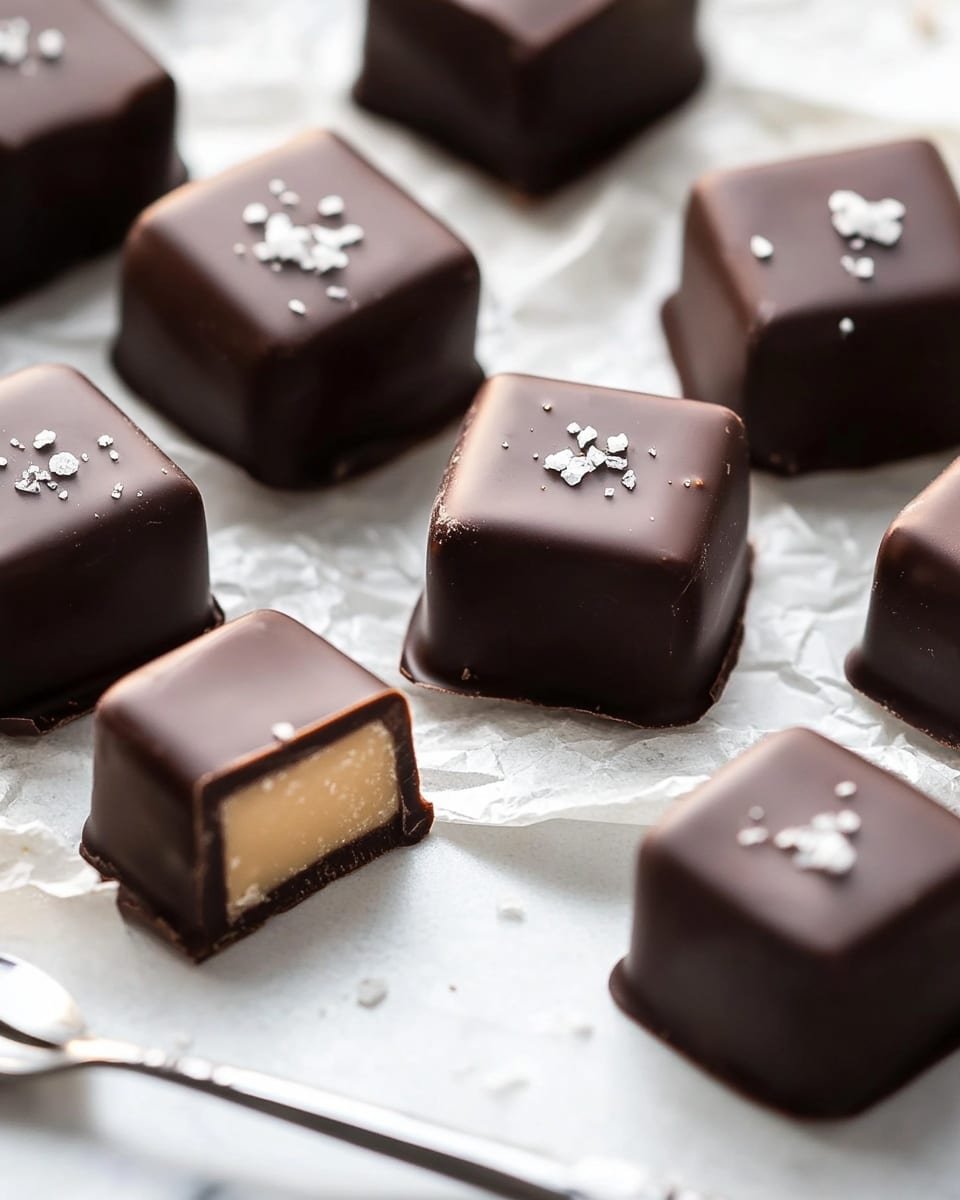
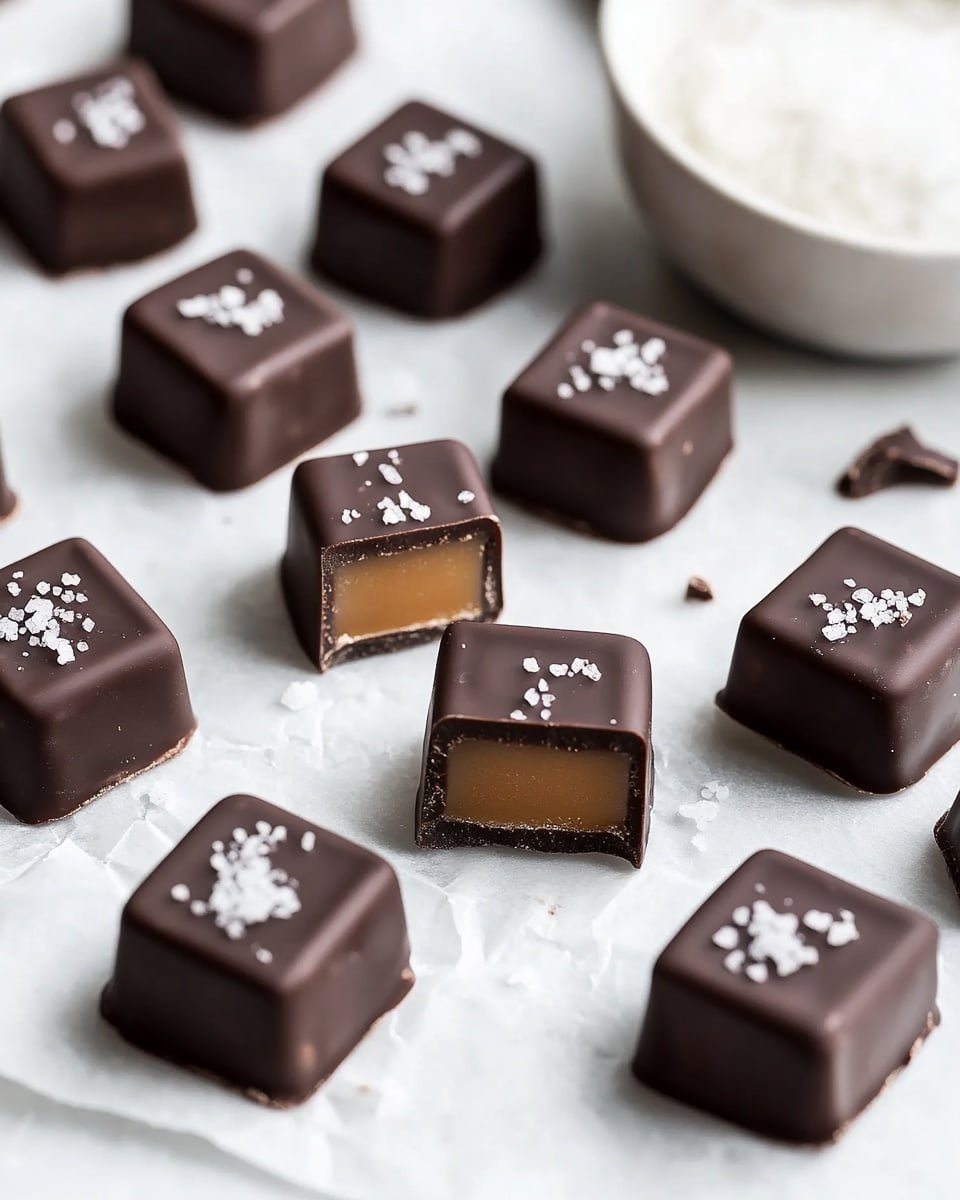
If you’re looking for a decadent treat that perfectly balances sweet and salty flavors, you’ve got to try this Chocolate Covered Caramels with Sea Salt Recipe. These luscious caramels are silky smooth inside with a satisfying snap of tempered chocolate outside, finished with a sprinkle of flaky sea salt that brings out every rich note.
Why You’ll Love This Recipe
- Perfect Sweet-Salty Balance: The flaky sea salt enhances the caramel’s sweetness, creating an irresistible flavor harmony.
- Luxuriously Smooth Texture: Cream, butter, and corn syrup come together to create caramels that melt beautifully in your mouth.
- Impressive Yet Simple: With straightforward ingredients and clear steps, you can make gourmet-quality candies at home.
- Customizable and Fun: Easily tailor toppings and chocolate types to your liking for a truly personal touch.
Ingredients You’ll Need
This recipe calls for a handful of kitchen staples, each playing a crucial role in crafting that perfect caramel flavor and texture. From the creaminess of heavy cream to the richness of butter, every component makes these Chocolate Covered Caramels with Sea Salt Recipe absolutely divine.
- Heavy cream: This adds the creamy, luscious base that makes the caramel so smooth and rich.
- Granulated sugar: Essential for that classic caramel sweetness and structure.
- Butter: Adds depth and silkiness, rounding out the flavor beautifully.
- Corn syrup: Helps prevent crystallization, so your caramels stay nice and chewy, not grainy.
- Vanilla extract: Gives a subtle warmth and complexity to the caramel.
- Flaky sea salt: Sprinkled on top, it elevates the whole experience with a little crunchy pop.
- Tempered chocolate: For dipping and coating – it creates that satisfying snap and glossy finish.
Note: Exact ingredients and measurements are listed in the recipe card below.
Variations
One of the best things about the Chocolate Covered Caramels with Sea Salt Recipe is how easy it is to tweak and make your own. Whether you want to change up the chocolate or add fun mix-ins, these caramels welcome your personal flair.
- Dark Chocolate Dipping: Swap milk chocolate for dark chocolate to add a bittersweet contrast that complements the caramel beautifully.
- Nutty Twist: Sprinkle finely chopped toasted nuts like pecans or almonds on top right after dipping for some added crunch and flavor.
- Spiced Caramel: Add a pinch of cinnamon or cayenne pepper to the caramel for an unexpected but delicious kick.
- Vegan Adaptation: Use coconut cream instead of heavy cream and dairy-free butter for a plant-based version that still delights.
How to Make Chocolate Covered Caramels with Sea Salt Recipe
Step 1: Prepare Your Pan
Start by buttering a 9-inch by 5-inch loaf pan thoroughly, then line it with a parchment paper sling, making sure to butter the paper as well. This ensures your caramel won’t stick and will lift out easily once set.
Step 2: Make the Caramel Base
In a large saucepan over medium-low heat, combine the heavy cream, sugar, butter, and corn syrup. Stir gently until the sugar dissolves and the butter melts, creating a smooth mixture ready for boiling.
Step 3: Cook to Perfection
Bring the mixture to a gentle boil, then reduce heat to medium. Stir often as the caramel cooks, carefully watching the temperature until it reaches exactly 245°F. This is your sweet spot for chewy, soft caramels — overcook and you’ll get hard candy, undercook and they won’t hold shape.
Step 4: Flavor and Set
Once off the heat, stir in the flaky salt and vanilla extract. Pour the hot caramel into your prepared pan and let it sit undisturbed for at least 6 hours — or overnight — to fully harden into a firm but yielding slab ready to slice.
Step 5: Cut and Dip
Carefully release the caramel slab from the pan by lifting the parchment sling. Transfer to a cutting board and cut into 1-inch squares. Then, dip each piece into tempered chocolate using a dipping fork, tapping off any excess. After dipping, lay them on parchment to set.
Step 6: Finish with Sea Salt
While the chocolate is still soft, sprinkle a little extra flaky sea salt on top — the final touch that makes these caramels truly crave-worthy. Let the chocolate fully harden at room temperature or in a cool place before storing.
Pro Tips for Making Chocolate Covered Caramels with Sea Salt Recipe
- Use a Candy Thermometer: Monitoring the temperature closely ensures your caramel hits the perfect soft-ball stage for ideal chewiness.
- Butter the Parchment Generously: Prevents sticking and helps in lifting the caramel slab out cleanly without breaking.
- Temper Your Chocolate Properly: For a beautiful glossy finish and that satisfying snap when you bite in.
- Don’t Skip the Sea Salt: It elevates the whole experience by cutting through sweetness and adding texture, so sprinkle right after dipping!
How to Serve Chocolate Covered Caramels with Sea Salt Recipe
Garnishes
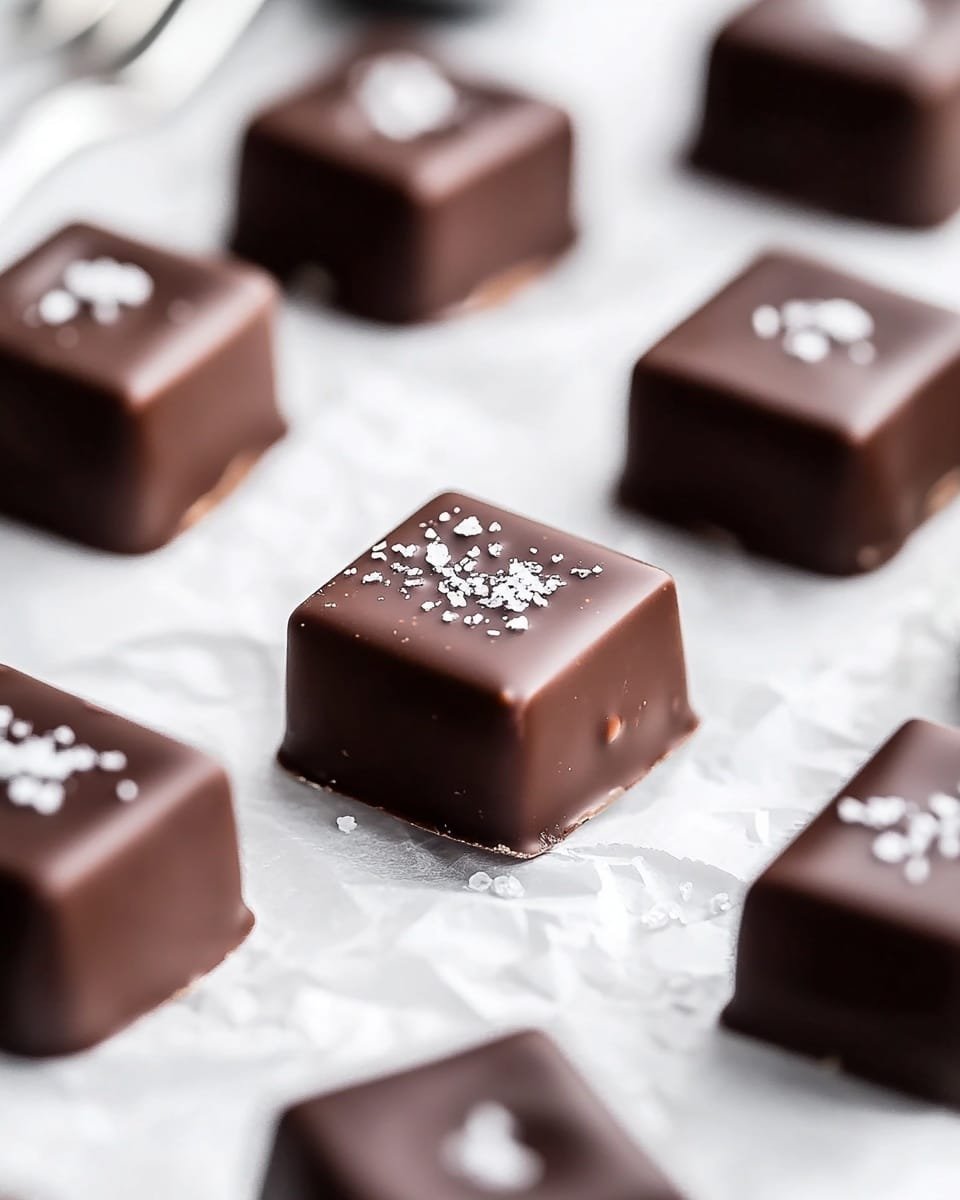
Simple garnishes like a pinch of extra flaky sea salt or finely chopped toasted nuts add texture and a professional touch. You can also experiment with a light dusting of cocoa powder or edible gold flakes for glam occasions.
Side Dishes
These caramels pair wonderfully with a rich cup of coffee or a smooth dessert wine. Serve them alongside a cheese board featuring mild cheeses and dried fruits for an impressive delight.
Creative Ways to Present
Arrange your caramels in pretty paper cups on a decorative platter or in a mason jar tied with a ribbon for gifting. You can also stack them in a clear box layered with parchment to show off their glossy chocolate coating and golden caramel center.
Make Ahead and Storage
Storing Leftovers
Store your Chocolate Covered Caramels with Sea Salt in an airtight container in a cool, dry place. They’ll stay fresh and delicious for up to two weeks, ready to enjoy anytime you crave a sweet bite.
Freezing
If you want to keep them longer, wrap individual caramels in wax paper and place them in a freezer-safe container. They freeze beautifully for up to three months — just thaw at room temperature before serving.
Reheating
There’s no need to reheat these caramels; they’re perfect at room temperature. Avoid heat to keep the chocolate crisp and the caramel texture just right.
FAQs
-
Can I use any type of chocolate for dipping?
Absolutely! While tempered dark or milk chocolate works best for that shiny finish and snap, you can also experiment with white chocolate or flavored chocolates—just make sure to temper properly for best results.
-
Why is tempering chocolate important in this recipe?
Tempering chocolate ensures a smooth, glossy coating that hardens with a satisfying snap. Without tempering, the chocolate may look dull and be soft or sticky at room temperature.
-
What if I don’t have a candy thermometer?
It’s tough to get the perfect caramel consistency without one, but you can do a cold water test: drop a bit of the hot caramel in ice water; it should form a soft, pliable ball that holds its shape but doesn’t become hard.
-
How do I prevent my caramel from sticking to the pan?
Butter the pan generously and line it with parchment paper, also buttering the paper. This double layer of grease prevents sticking and makes lifting out the caramel slab a breeze.
Final Thoughts
There’s something incredibly satisfying about making your own Chocolate Covered Caramels with Sea Salt Recipe from scratch — it’s a delicious way to spoil yourself or impress guests with little effort. So grab your ingredients and enjoy the journey of turning simple pantry staples into a truly exceptional treat!
PrintChocolate Covered Caramels with Sea Salt Recipe
Indulge in these decadent chocolate covered caramels with sea salt, a perfect balance of rich buttery caramel coated in smooth tempered chocolate and finished with a sprinkle of flaky sea salt for a delightful sweet and salty treat.
- Prep Time: 30 minutes
- Cook Time: 30 minutes
- Total Time: 1 hour
- Yield: 28 caramels
- Category: Dessert
- Method: Stovetop
- Cuisine: American
Ingredients
Caramel
- 1 cup heavy cream
- 1 cup granulated sugar
- 3 tbsp butter
- 1/2 cup corn syrup
- 1 tsp vanilla extract
- 1/2 tsp flaky salt, plus more for sprinkling
Chocolate Coating
- 12 oz tempered chocolate
Instructions
- Prepare the Pan: Butter a 9-inch x 5-inch loaf pan and line it with a parchment paper sling. Butter the parchment paper as well and set aside to prevent sticking.
- Make the Caramel Base: In a large saucepan over medium-low heat, combine the heavy cream, granulated sugar, butter, and corn syrup. Stir continuously until the sugar dissolves and the butter melts completely.
- Cook the Caramel: Increase heat until the mixture comes to a boil, then reduce to medium. Stir often and monitor closely to avoid boiling over or scorching. Cook until the syrup reaches 245°F (firm ball stage), about 15 minutes.
- Flavor and Set Caramel: Remove the saucepan from heat. Stir in the flaky salt and vanilla extract evenly. Pour the hot caramel mixture into the prepared pan and allow it to sit at room temperature for at least 6 hours to fully harden.
- Cut the Caramels: Run a sharp knife along the edges of the pan, then lift the caramel slab out using the parchment paper sling. Place it on a cutting board and slice into 1-inch squares.
- Temper the Chocolate: Ensure your chocolate is properly tempered to achieve a glossy finish and good snap. Prepare a baking sheet lined with parchment paper for dipped caramels.
- Dip the Caramels: Using a chocolate dipping fork, completely submerge each caramel piece into the tempered chocolate. Lift and gently tap the fork 3-5 times to let excess chocolate drip off. Scrape the bottom edge against the chocolate bowl to remove extra coating before placing the caramel onto the baking sheet.
- Finish with Sea Salt: After about a minute of setting, sprinkle each chocolate-covered caramel with a little sea salt. Repeat this dipping and salting process with all caramel pieces.
- Set and Store: Allow the chocolate to crystallize and harden over the next few days at room temperature. Store the finished caramels in a cool, dry place to maintain their texture and flavor.
Notes
- Use a candy thermometer to accurately gauge caramel temperature for perfect texture.
- Tempering chocolate is essential for a shiny finish and prevents chocolate from melting quickly.
- Store caramels in an airtight container to avoid moisture absorption.
- If you don’t have a dipping fork, use a fork or skewer but be gentle to avoid breaking caramel.
- Flaky sea salt on top adds a lovely contrast to the sweetness; adjust sprinkling amount to taste.

